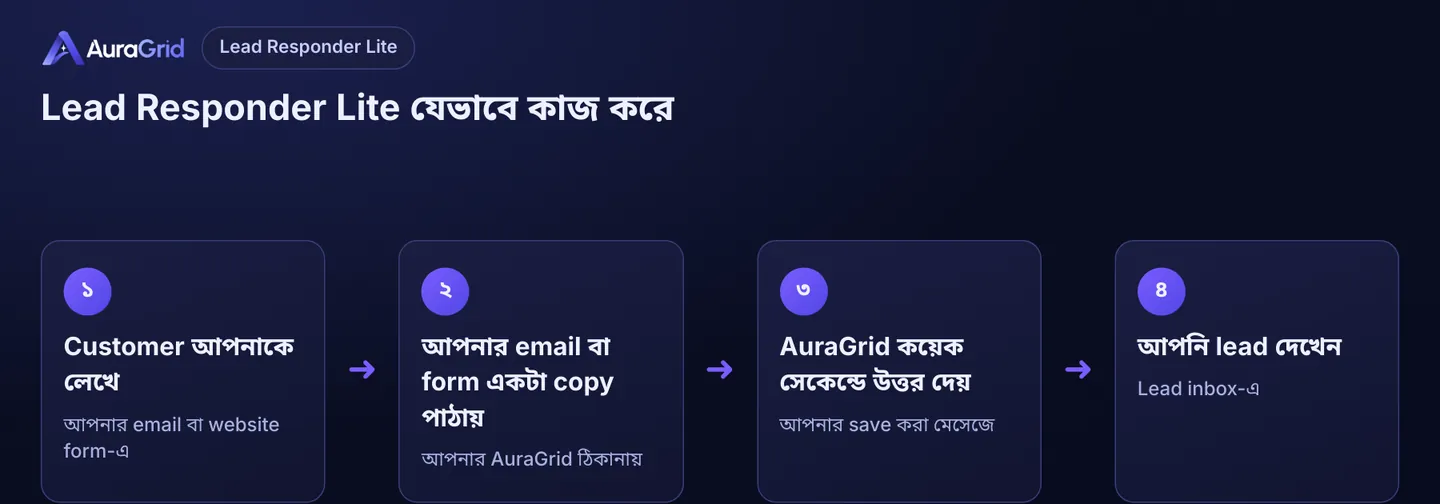
Lead Responder Lite প্রতিটা নতুন enquiry-র উত্তর কয়েক সেকেন্ডে দেয়, আপনার নিজের কথায়। একবার যুক্ত করলেই হবে: আপনার email বা website form প্রতিটা enquiry-র একটা copy আপনার নিজস্ব AuraGrid ঠিকানায় পাঠাবে, আর আমরা আপনার হয়ে উত্তর দেব।
দাম: ৳৩,৪৯৯/মাস, অথবা ৳২৯,৩৯০/বছর (৩০% সাশ্রয়)। ৭ দিনের free trial, card লাগে না; ৫ম দিনে invoice/bKash, ৮ম দিনে পরিশোধ। টাকা না দিলে account pause হয়, কোনো data মোছা হয় না।
Illustration, your screen may look slightly different
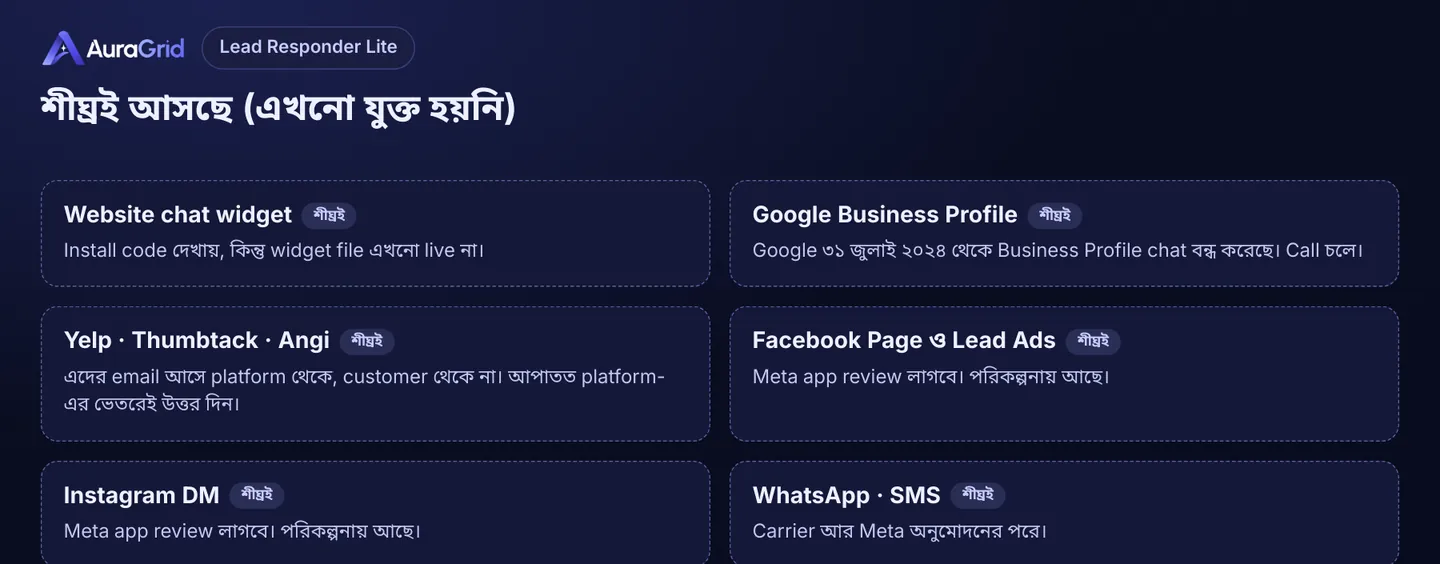
কোন কোন channel যুক্ত করা যায়?
Channel
অবস্থা
আপনার এখনকার email (Gmail, Outlook / Microsoft 365, hosting-এর website email)
চালু
Website contact form (WordPress Contact Form 7, WPForms, Wix, Squarespace, Webflow, যেকোনো form যা email পাঠায়)
চালু
Website chat widget
শীঘ্রই আসছে
Google Business Profile
শীঘ্রই আসছে (Google ৩১ জুলাই ২০২৪ থেকে chat বন্ধ করেছে)
Yelp, Thumbtack, Angi
শীঘ্রই আসছে
Facebook Page, Lead Ads, Instagram
শীঘ্রই আসছে
WhatsApp, SMS
শীঘ্রই আসছে
Illustration, your screen may look slightly different
অংশ ১: আপনার AuraGrid dashboard (৫ মিনিট)
লগ ইন করুন। auragridlabs.com › লগ ইন। Email দিন, Password দিয়ে sign in বাছুন (অথবা sign-in link নিন)।
Real screen · AuraGrid preview
ব্যবসার তথ্য দিন। Dashboard › Setup › ধাপ ১: ব্যবসার নাম, ফোন, time zone, booking link, সেবা। Continue চাপুন।
Real screen · AuraGrid preview
Forwarding ঠিকানা copy করুন। Dashboard › Channels › ফরওয়ার্ডিং ইমেইল › কপি। দেখতে -এর মতো, শুধু আপনার।
Real screen · AuraGrid preview
রিপ্লাই মেসেজ বাছুন। Setup › ধাপ ৩ (বা Reply): একটা template বাছুন বা নিজে লিখুন। Live preview দেখুন। সেভ চাপলেই চালু।
Real screen · AuraGrid preview
নিজেকে একটা টেস্ট পাঠান। Setup › ধাপ ৪। Test যাবে শুধু আপনার login email-এ।
Real screen · AuraGrid preview
একটা channel যুক্ত করুন (অংশ ২), তারপর অন্য email থেকে নিজেকে লিখুন বা নিজের form পূরণ করুন।
Google Workspace-এ Forwarding না দেখালে admin-কে automatic forwarding চালু করতে হবে।
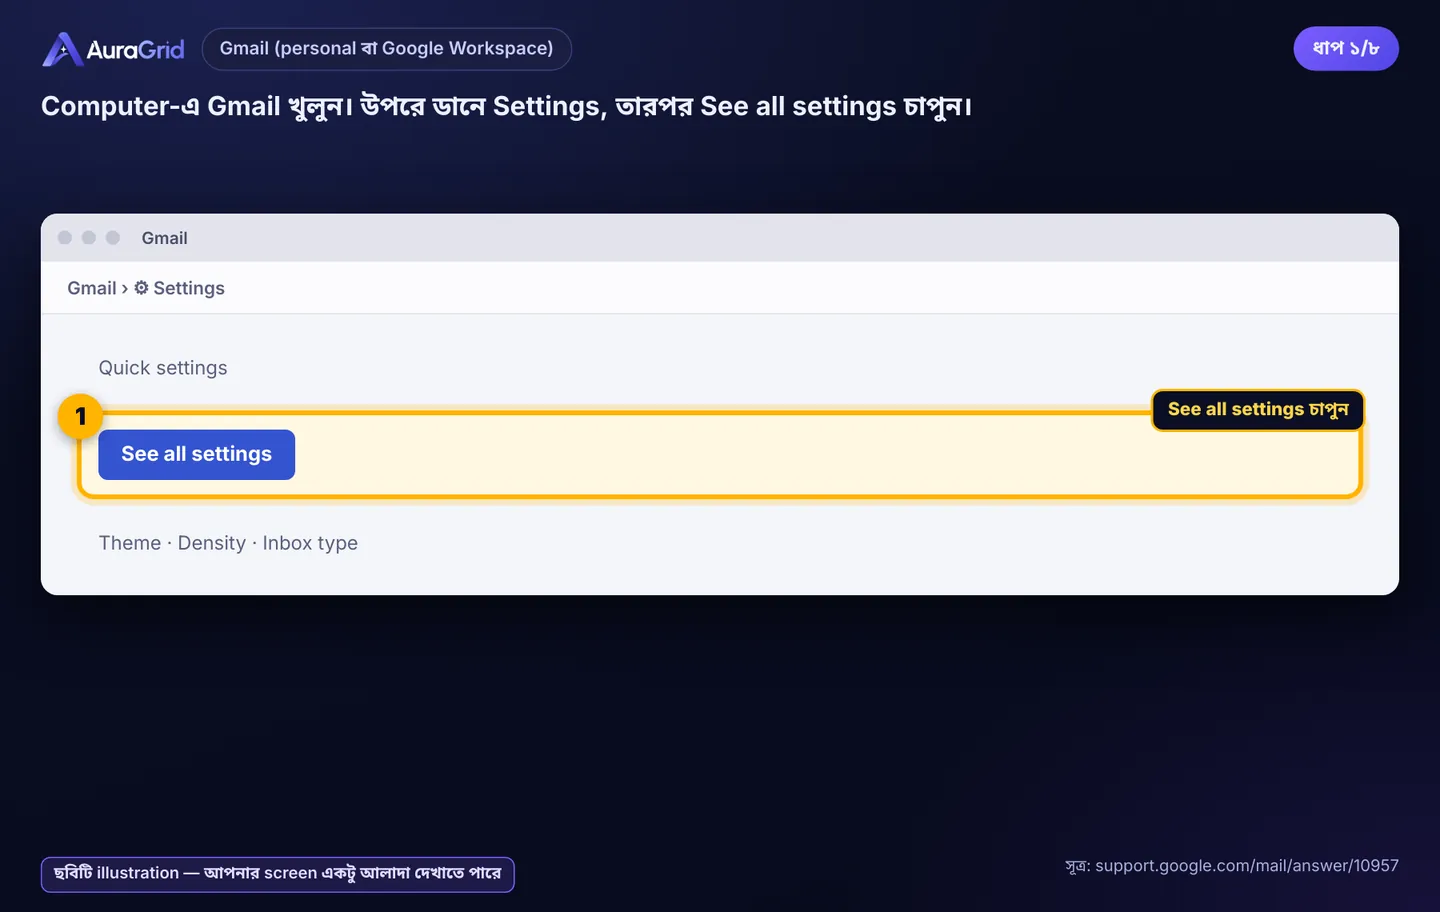
Computer-এ Gmail খুলুন। উপরে ডানে Settings › See all settings।
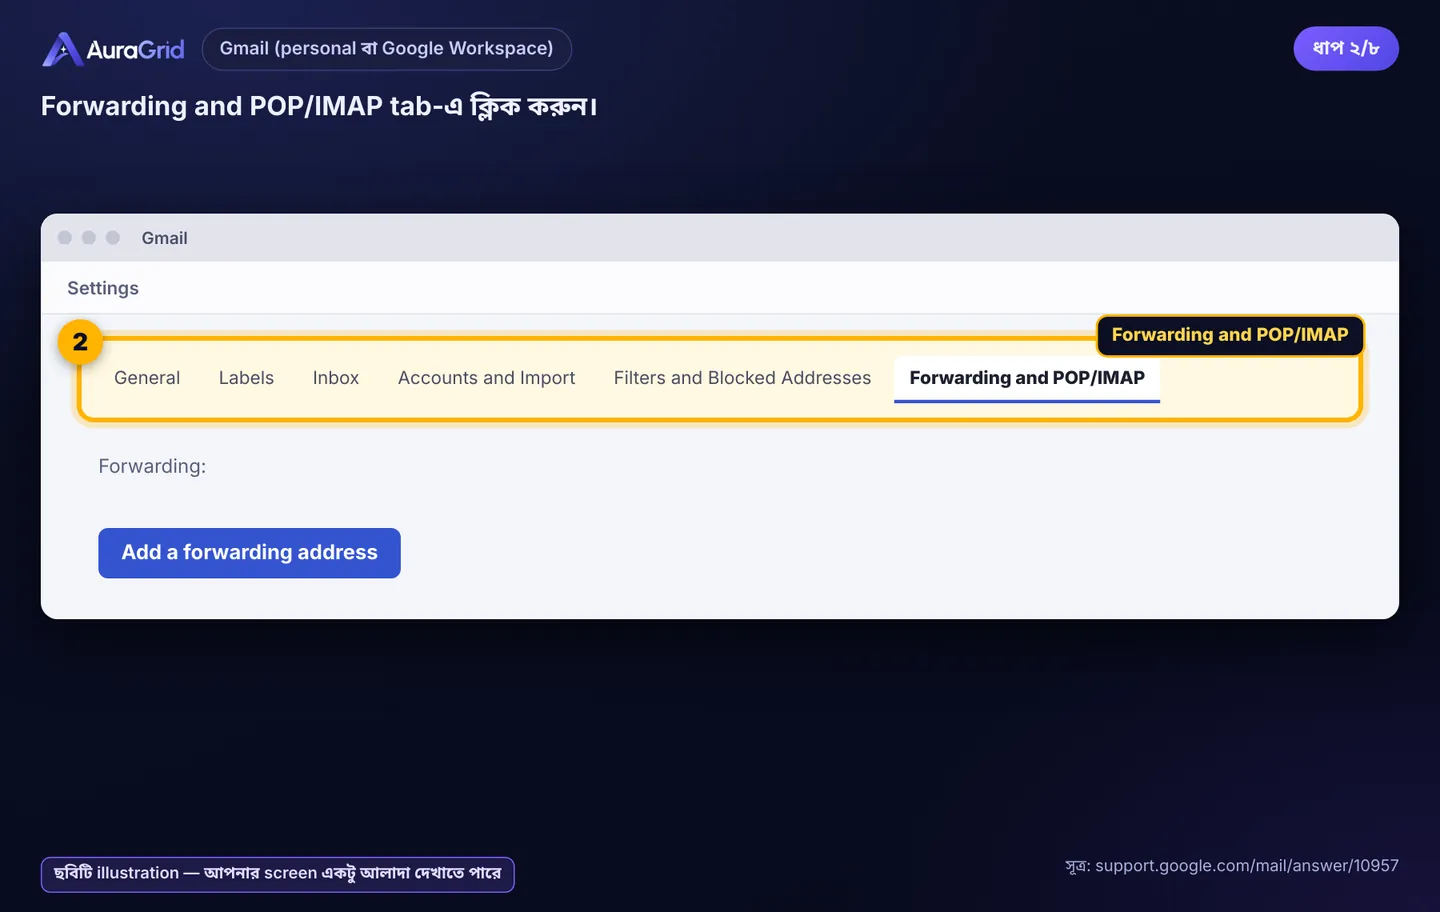
Forwarding and POP/IMAP tab।
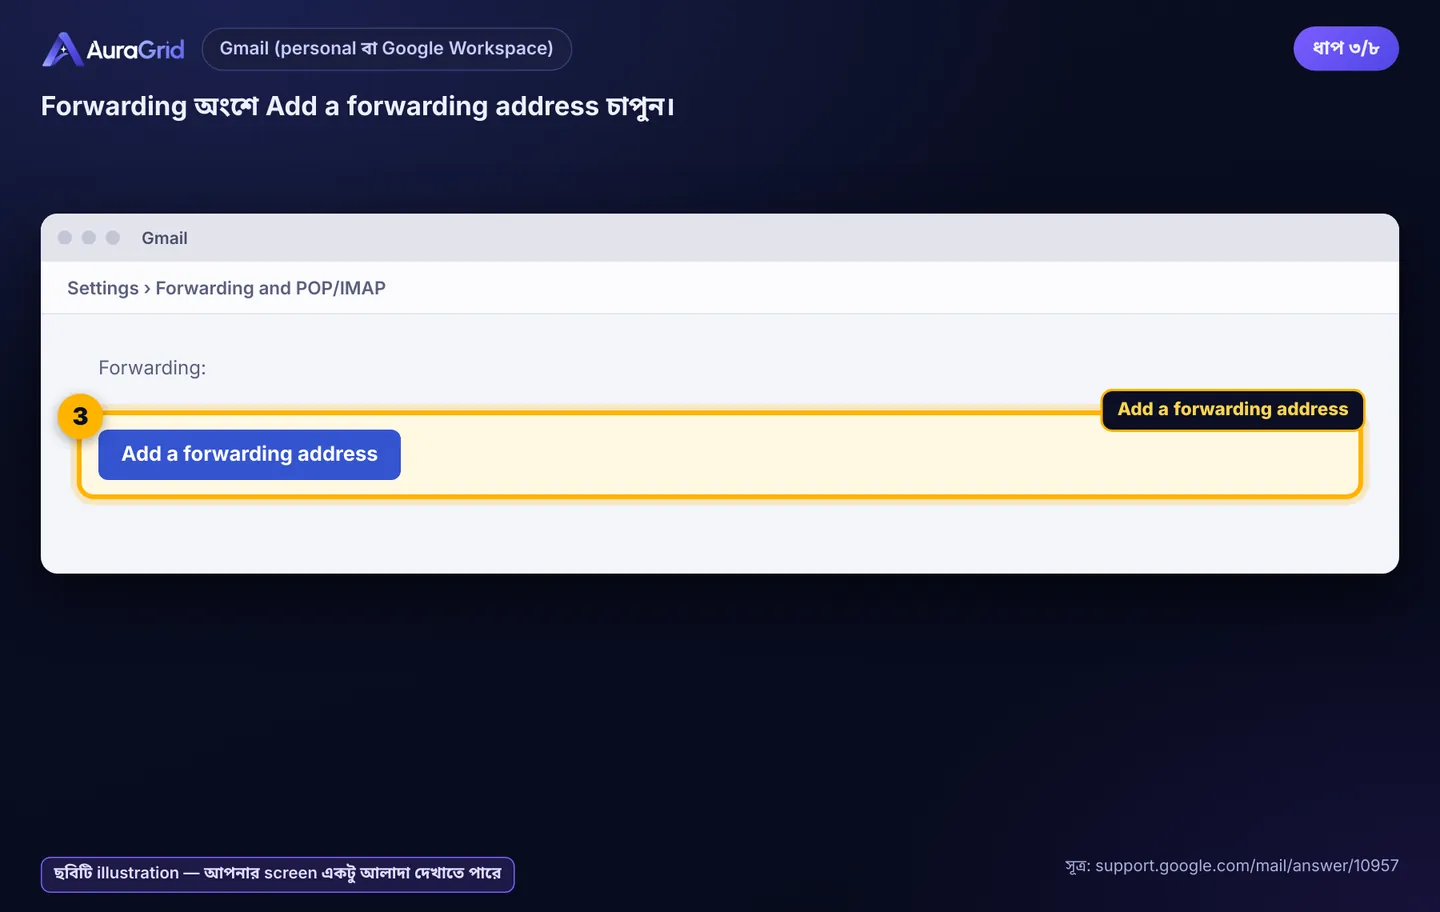
Forwarding অংশে Add a forwarding address।
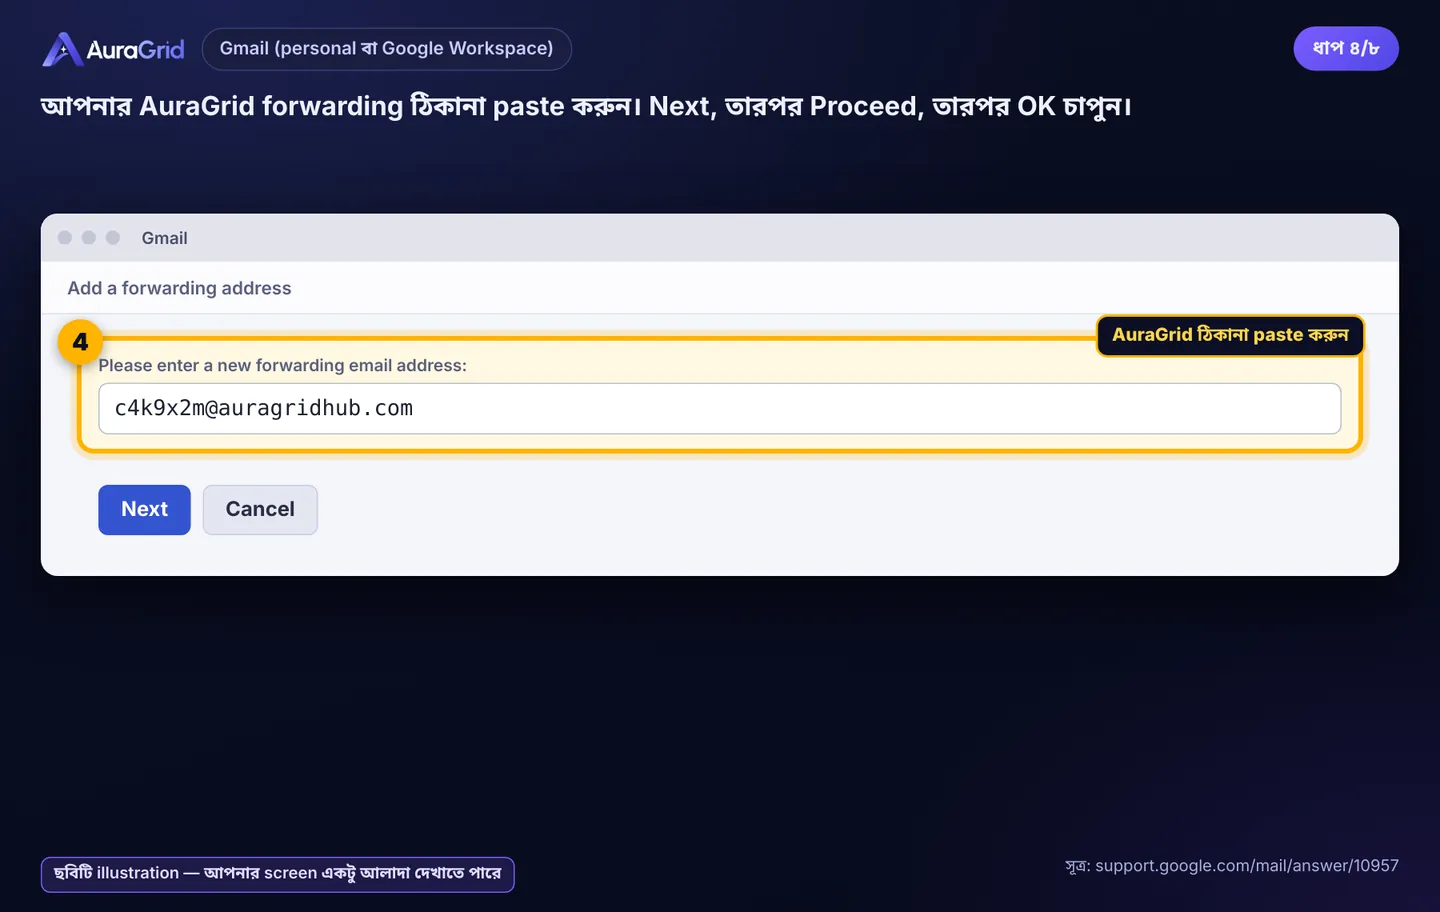
AuraGrid ঠিকানা paste করুন। Next › Proceed › OK।
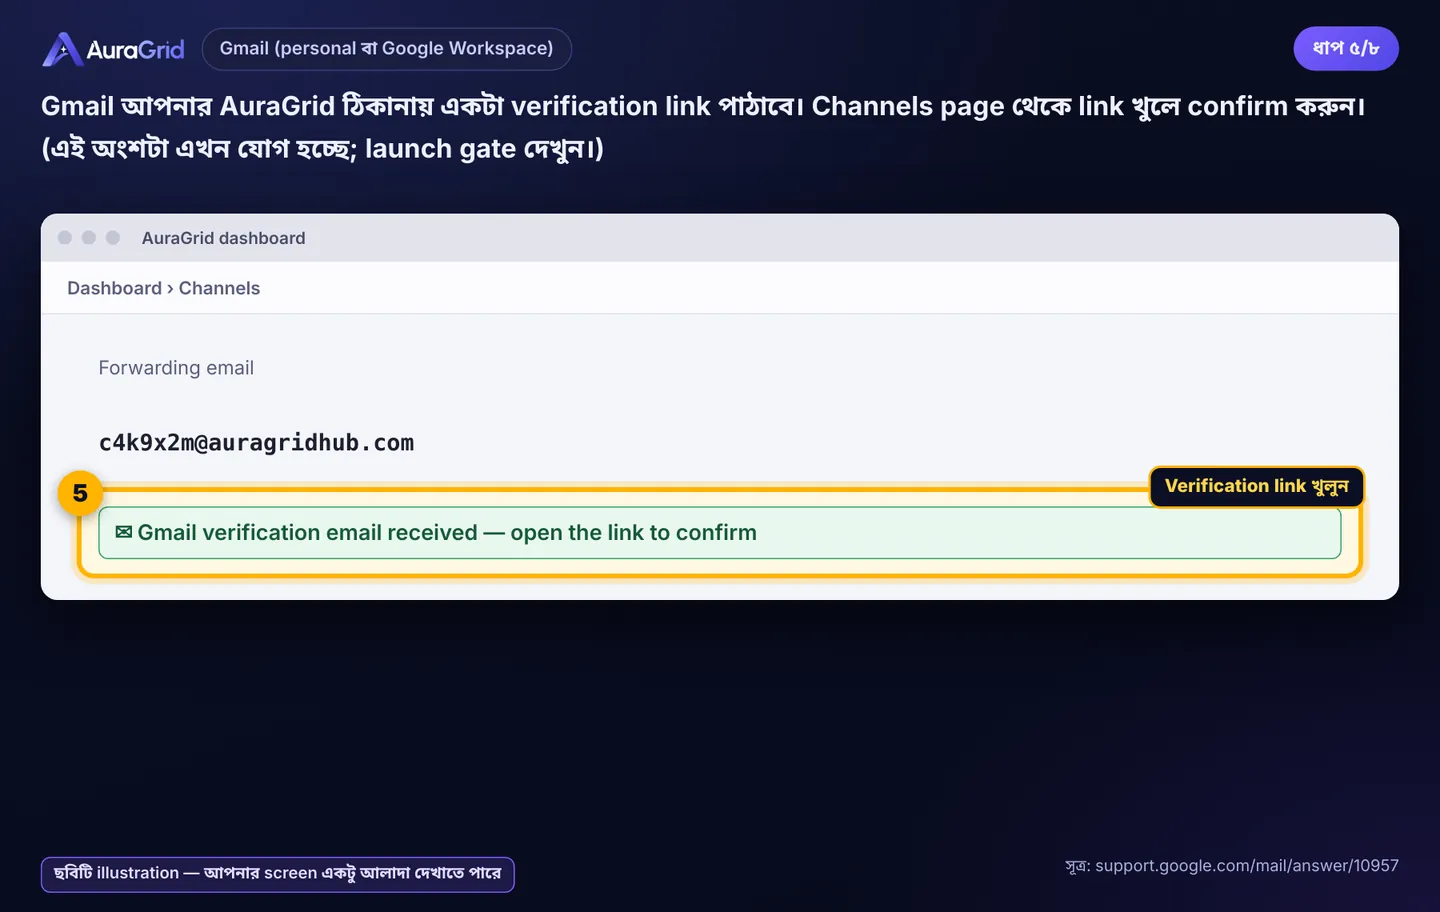
Gmail আপনার AuraGrid ঠিকানায় একটা verification link পাঠাবে। Dashboard › Channels থেকে খুলে confirm করুন।
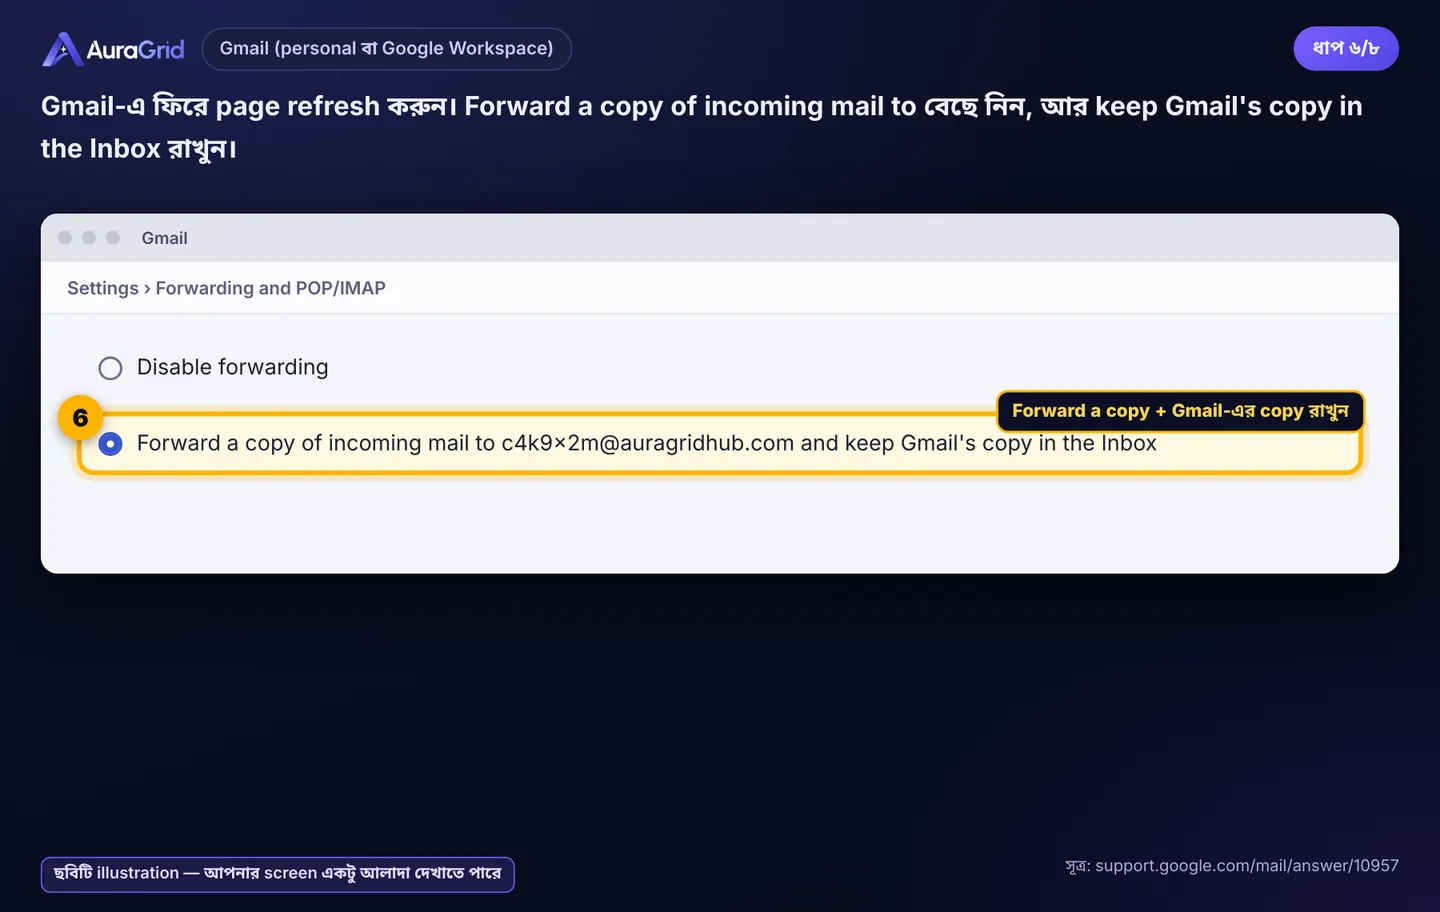
Gmail-এ ফিরে refresh করুন। Forward a copy of incoming mail to বাছুন, আর keep Gmail's copy in the Inbox রাখুন।
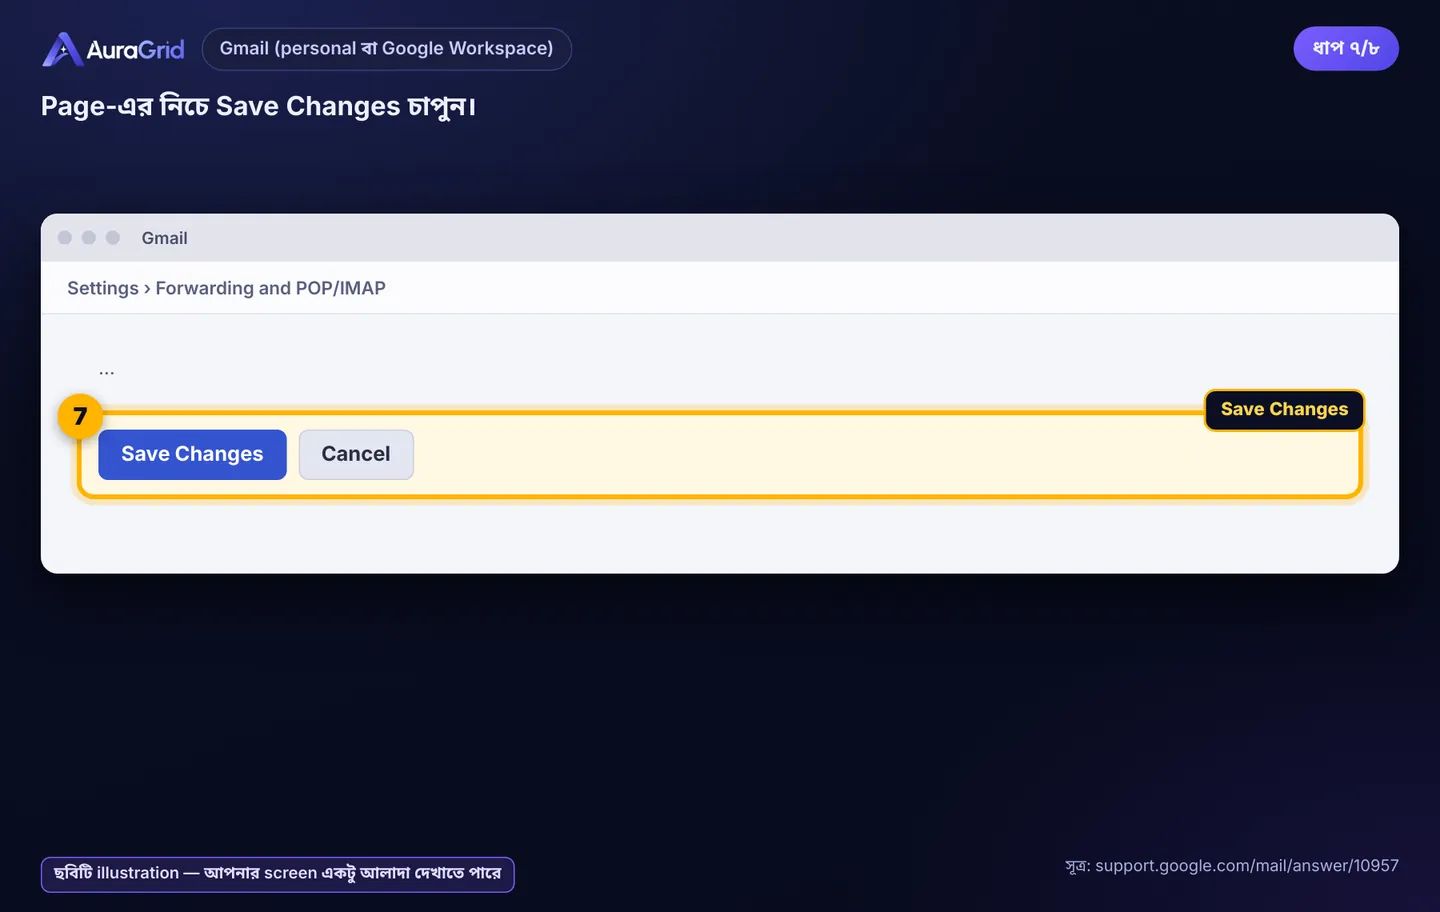
নিচে Save Changes।
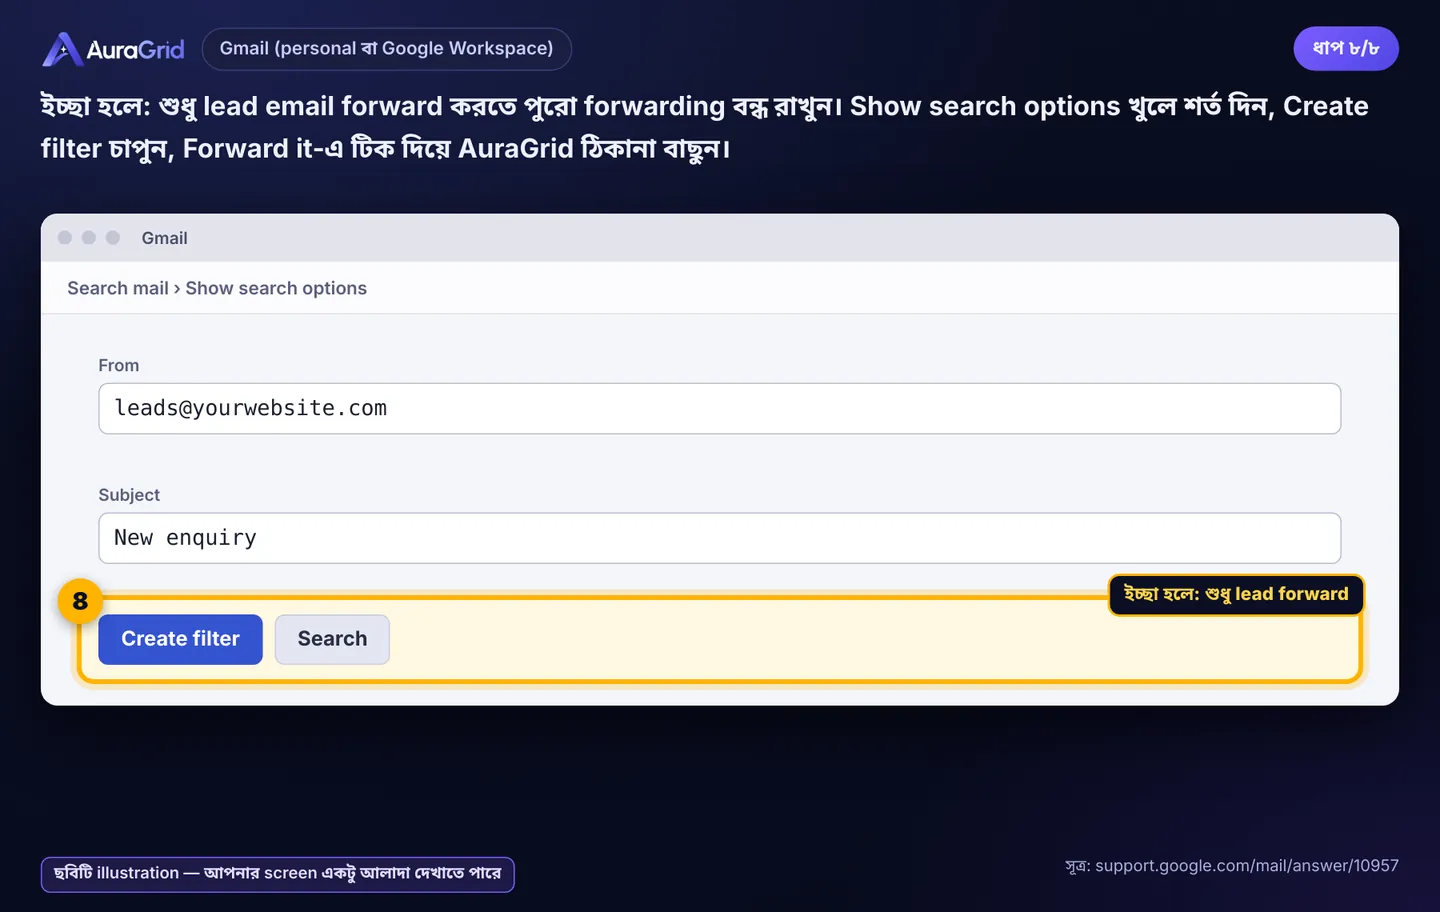
ইচ্ছা হলে শুধু lead email: Show search options › শর্ত › Create filter › Forward it › AuraGrid ঠিকানা।
Illustration, your screen may look slightly differentIllustration, your screen may look slightly differentIllustration, your screen may look slightly differentIllustration, your screen may look slightly differentIllustration, your screen may look slightly differentIllustration, your screen may look slightly differentIllustration, your screen may look slightly differentIllustration, your screen may look slightly different
২খ. Outlook / Microsoft 365
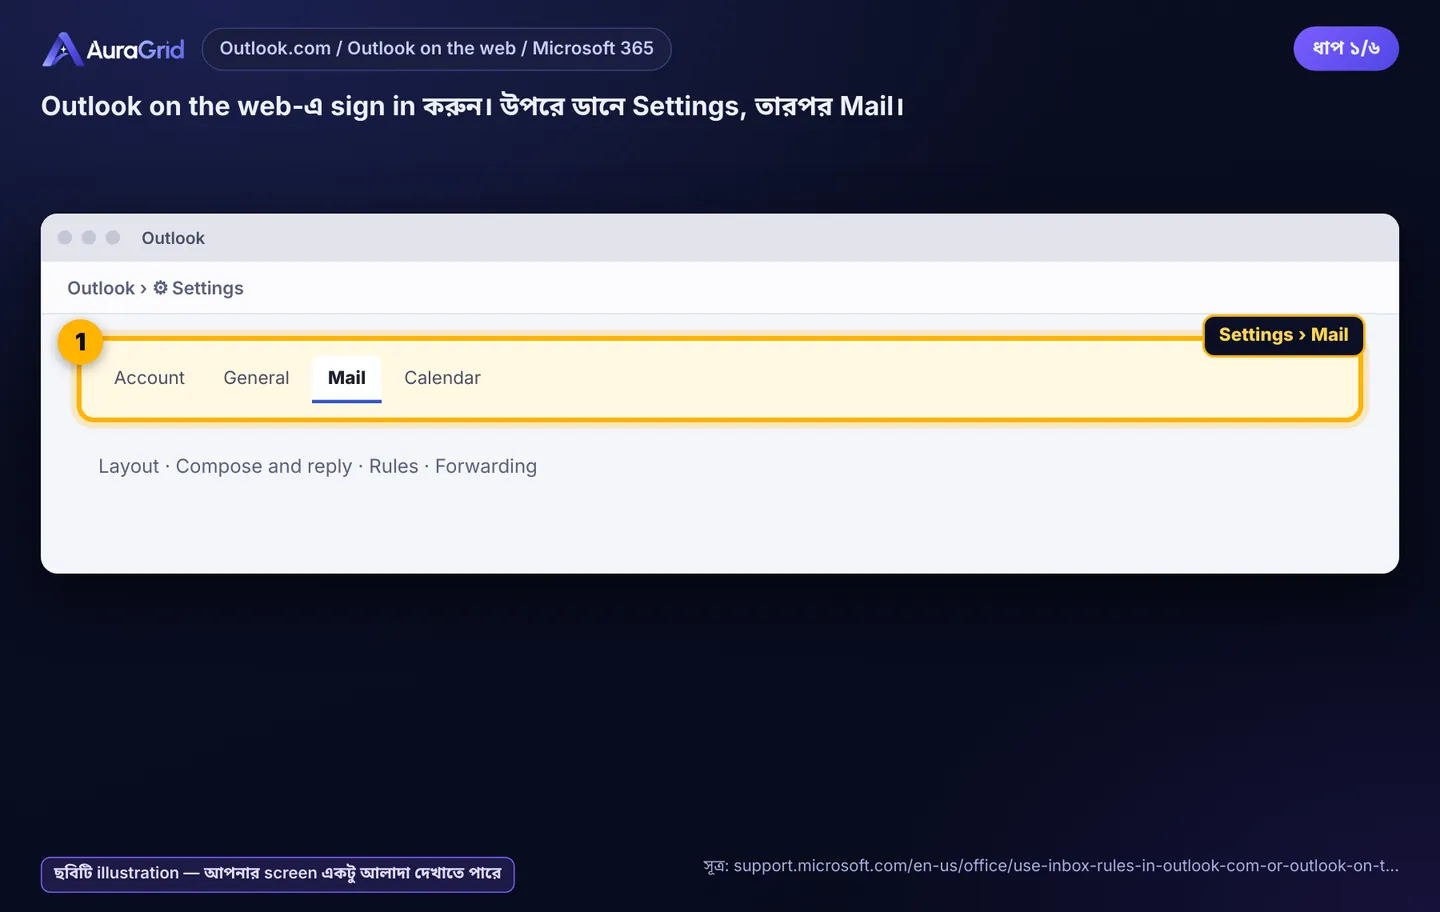
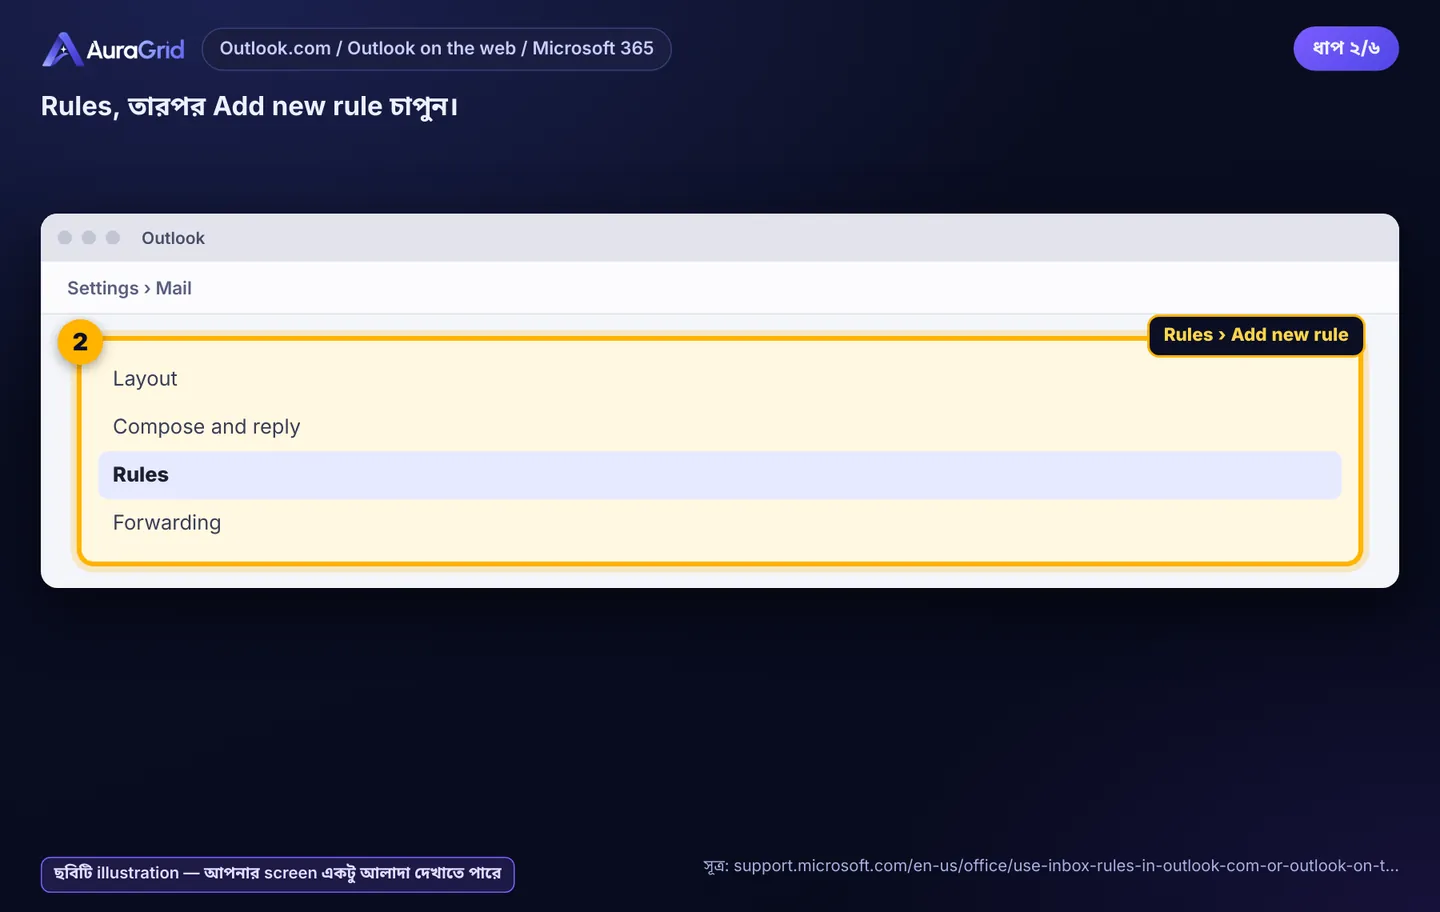
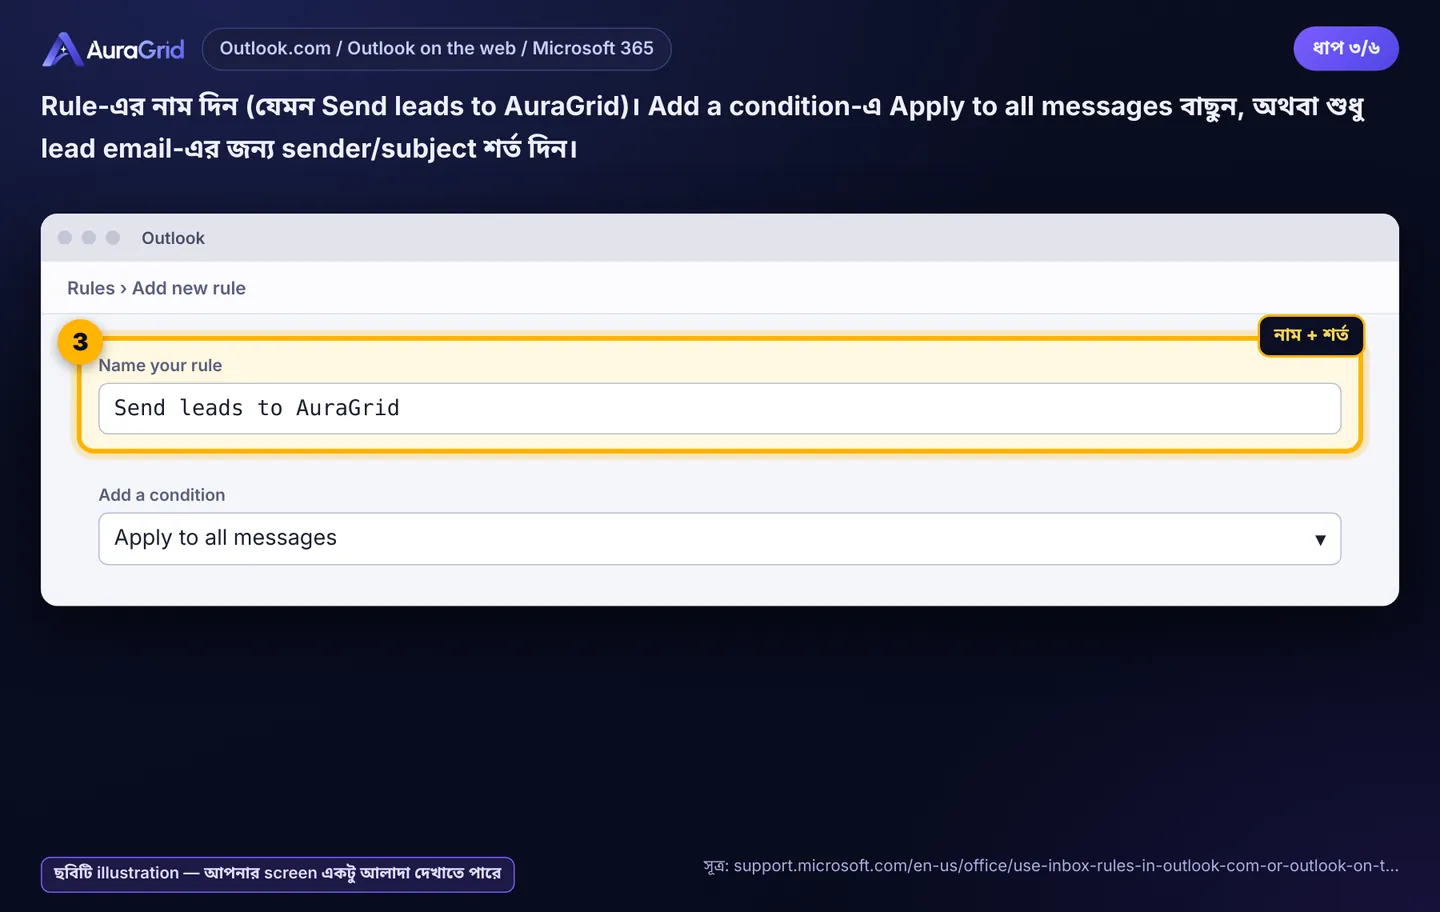
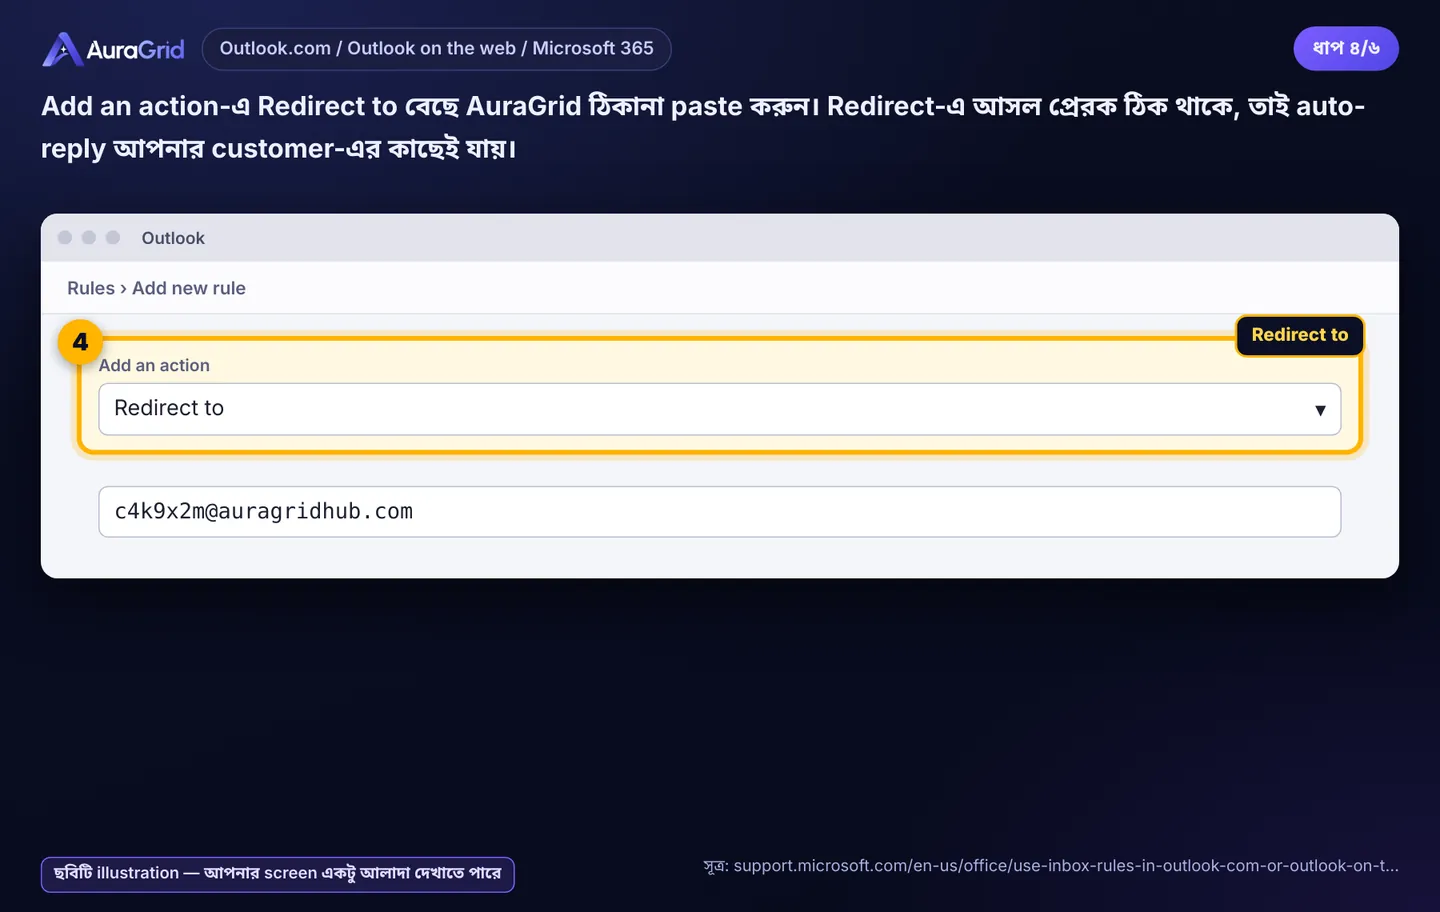
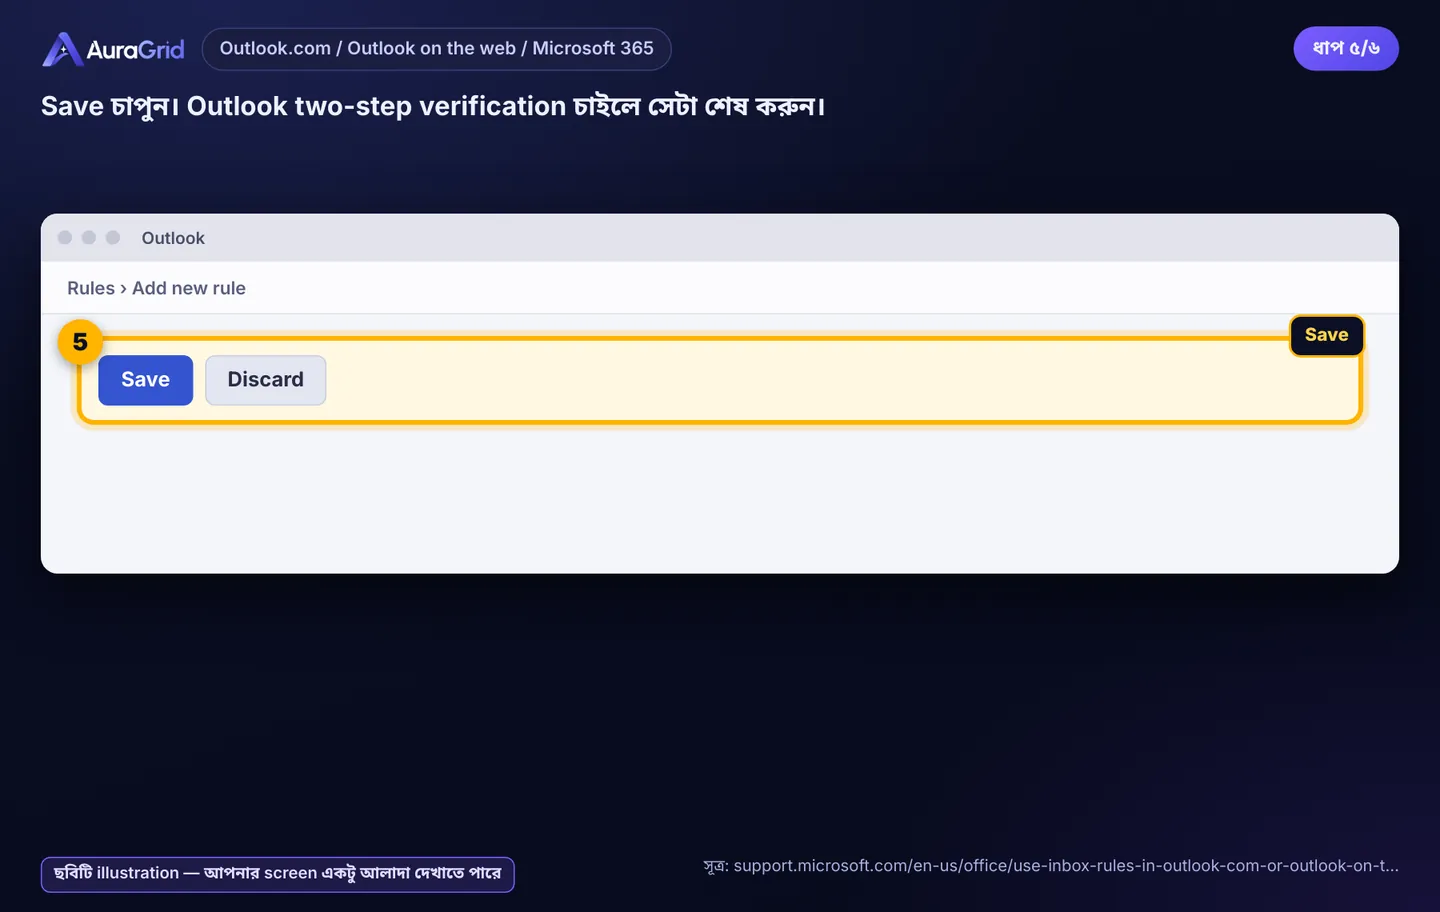
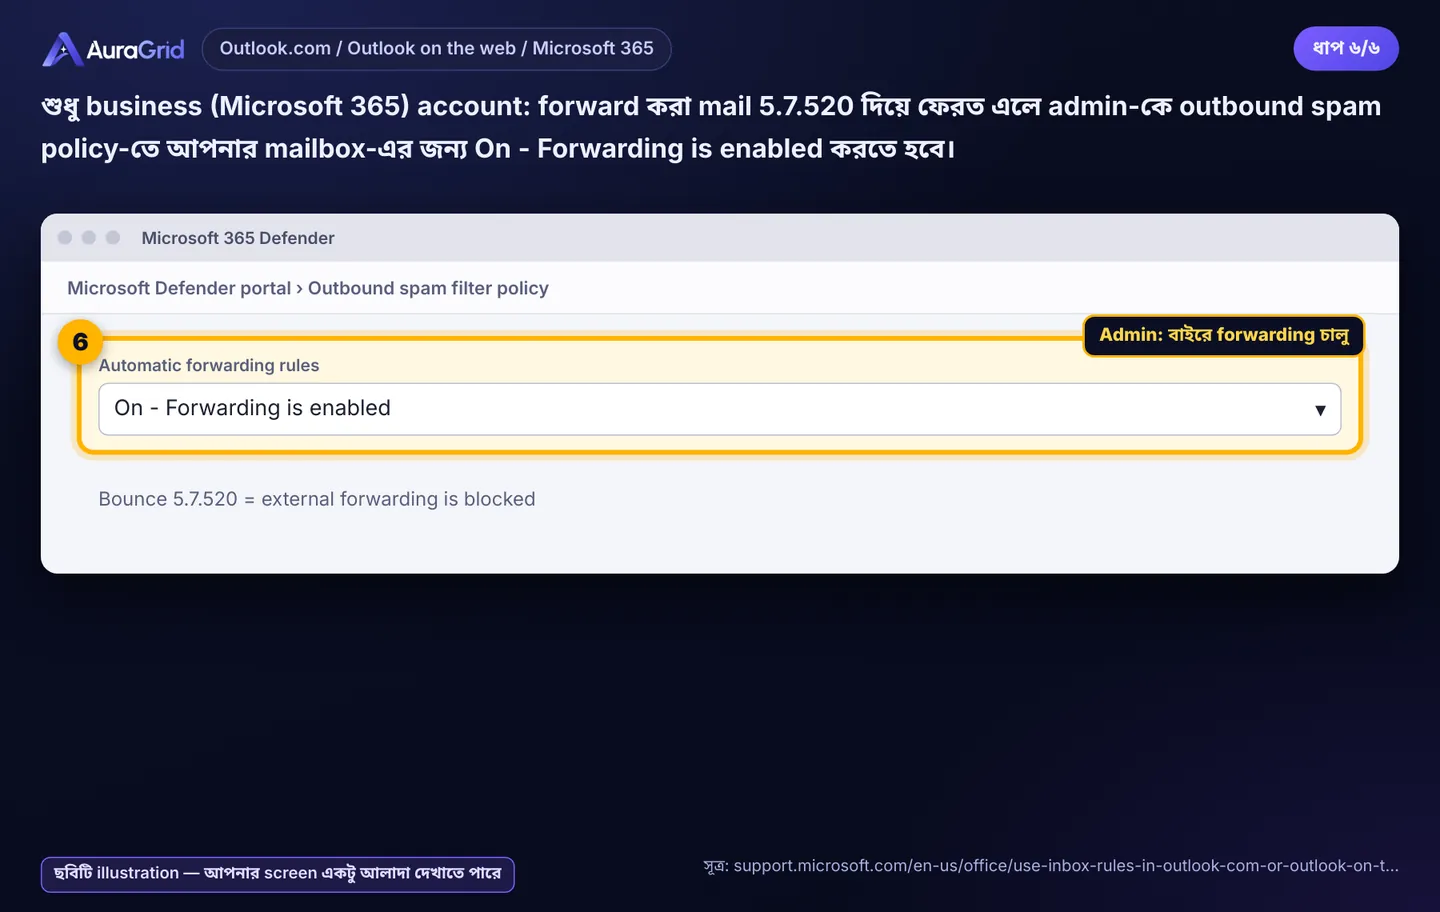
Outlook on the web › Settings › Mail। ২. Rules › Add new rule। ৩. নাম দিন; Add a condition: Apply to all messages। ৪. Add an action: Redirect to › AuraGrid ঠিকানা (আসল প্রেরক ঠিক থাকে)। ৫. Save; two-step verification চাইলে শেষ করুন। ৬. Business account-এ 5.7.520 দিয়ে mail ফেরত এলে admin-কে outbound spam policy-তে On - Forwarding is enabled করতে বলুন।
Illustration, your screen may look slightly differentIllustration, your screen may look slightly differentIllustration, your screen may look slightly differentIllustration, your screen may look slightly differentIllustration, your screen may look slightly differentIllustration, your screen may look slightly different
Illustration, your screen may look slightly differentIllustration, your screen may look slightly differentIllustration, your screen may look slightly differentIllustration, your screen may look slightly differentIllustration, your screen may look slightly different
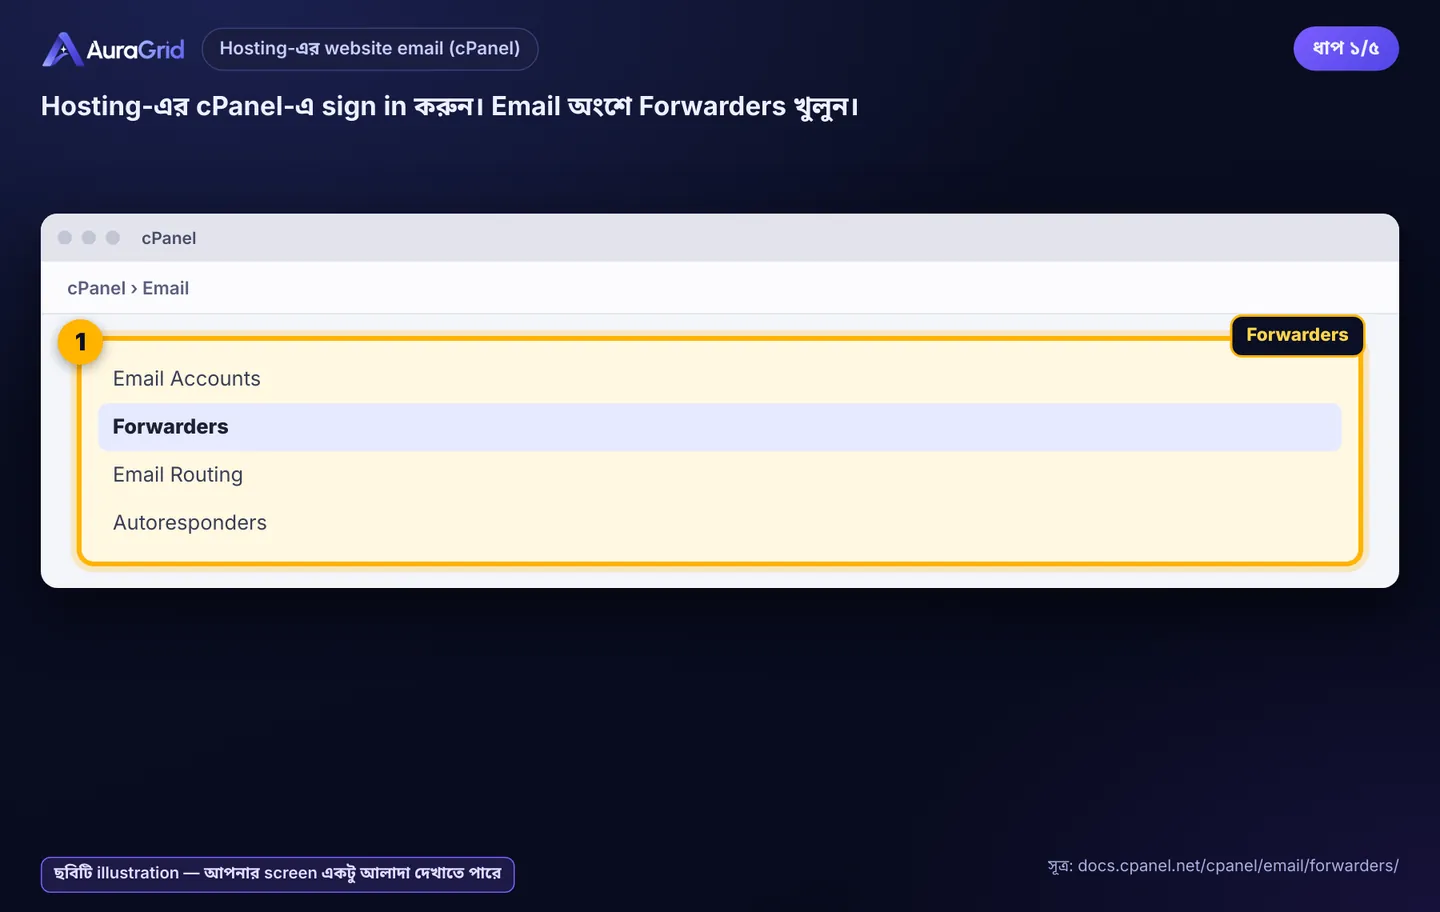
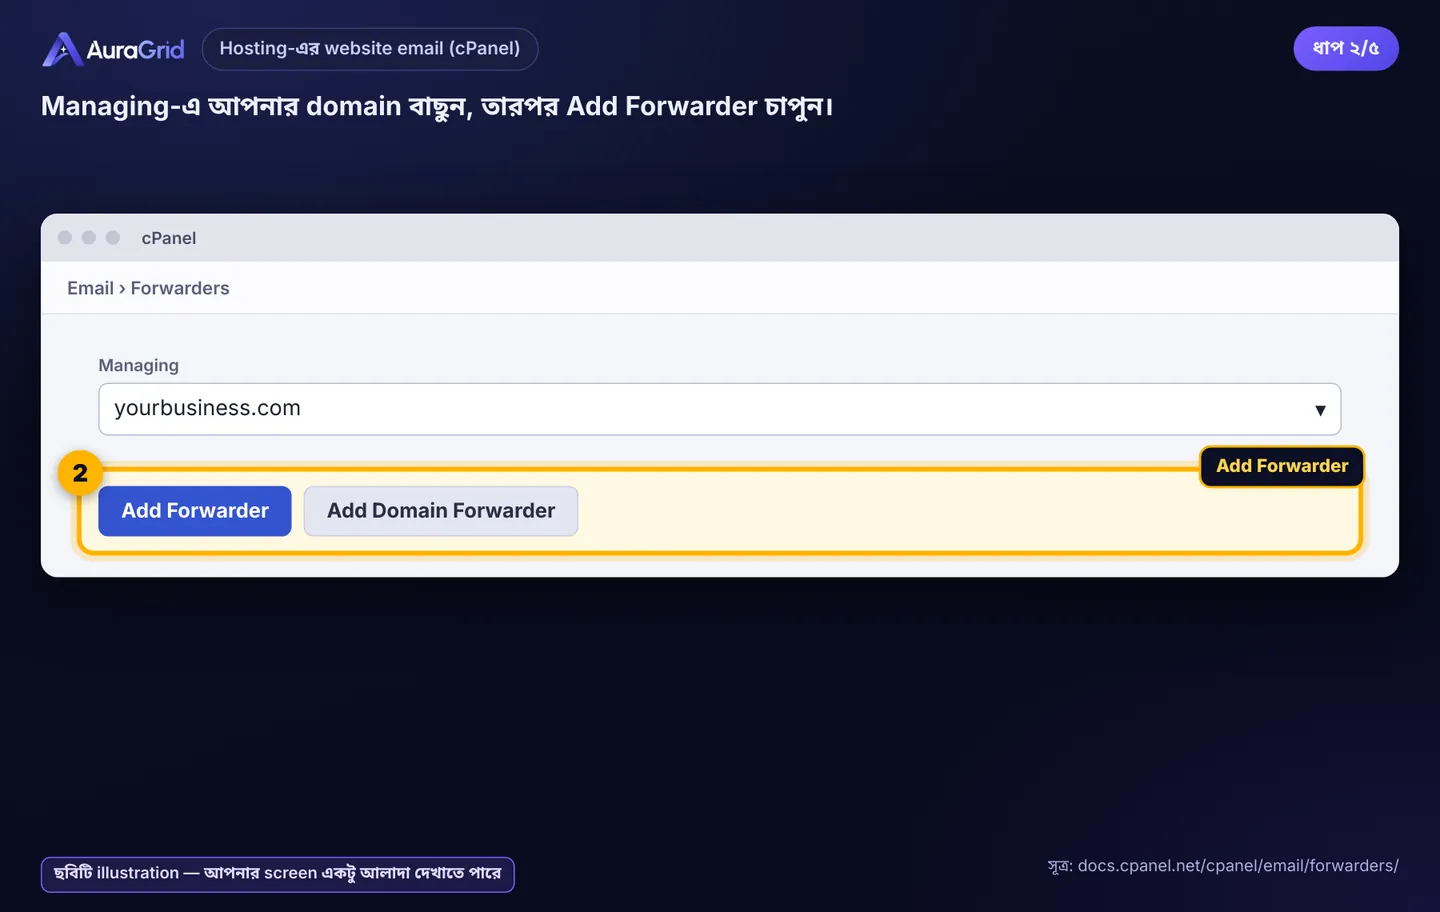
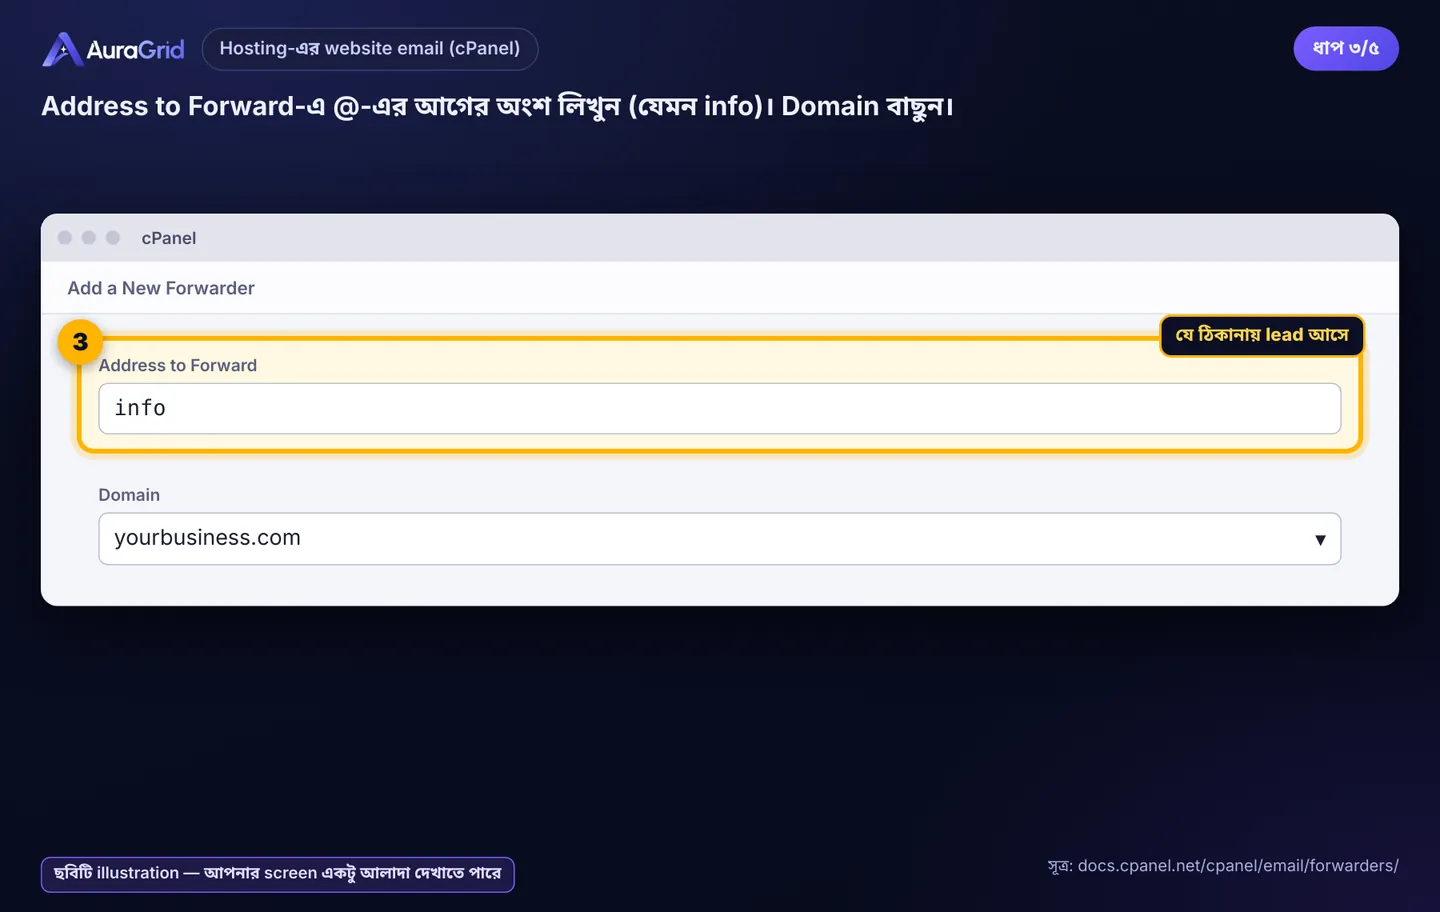
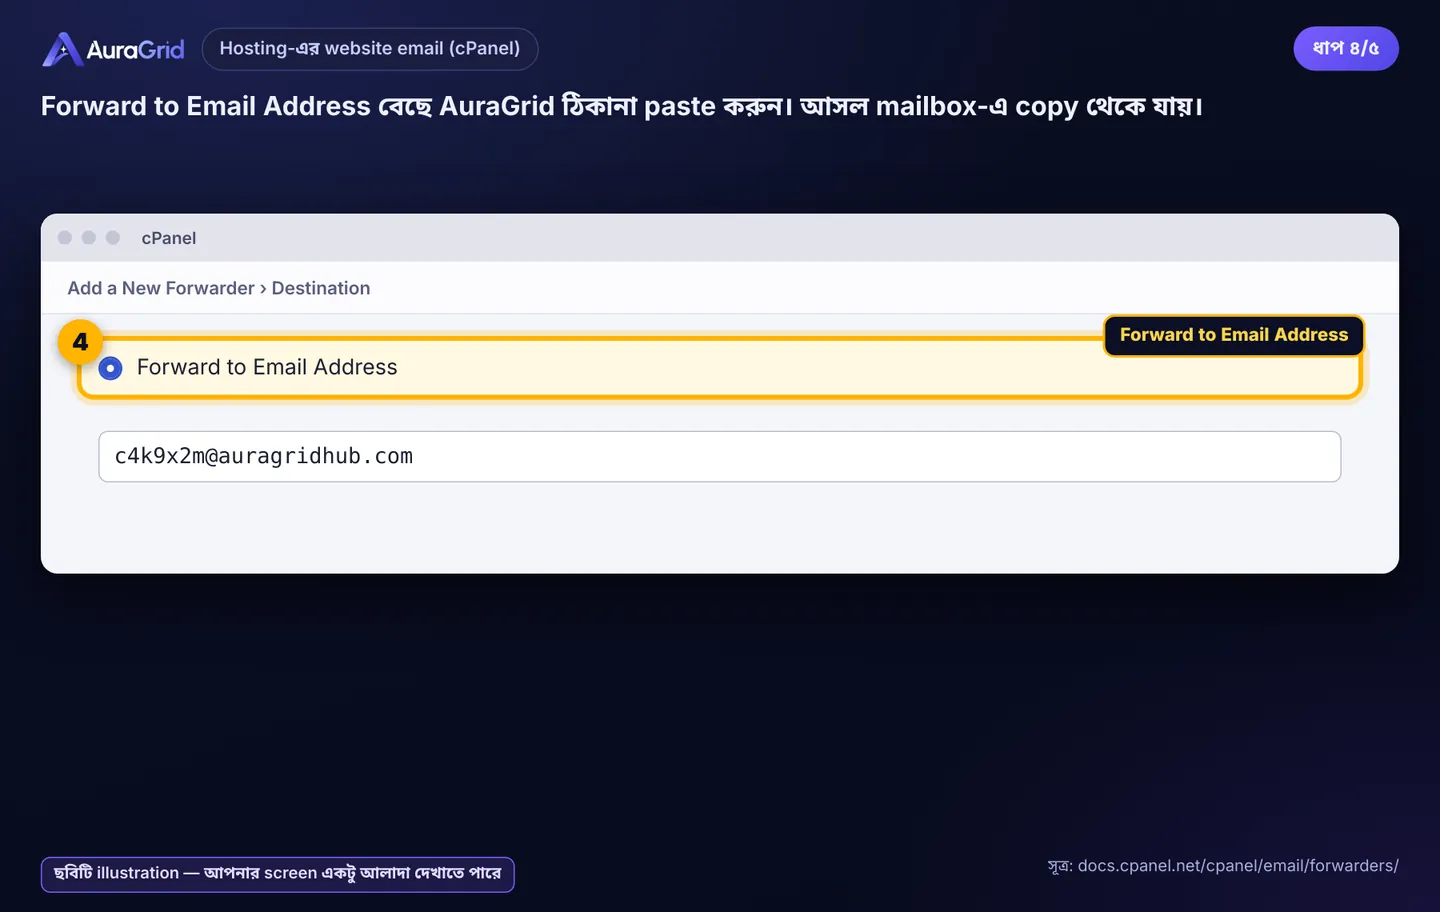
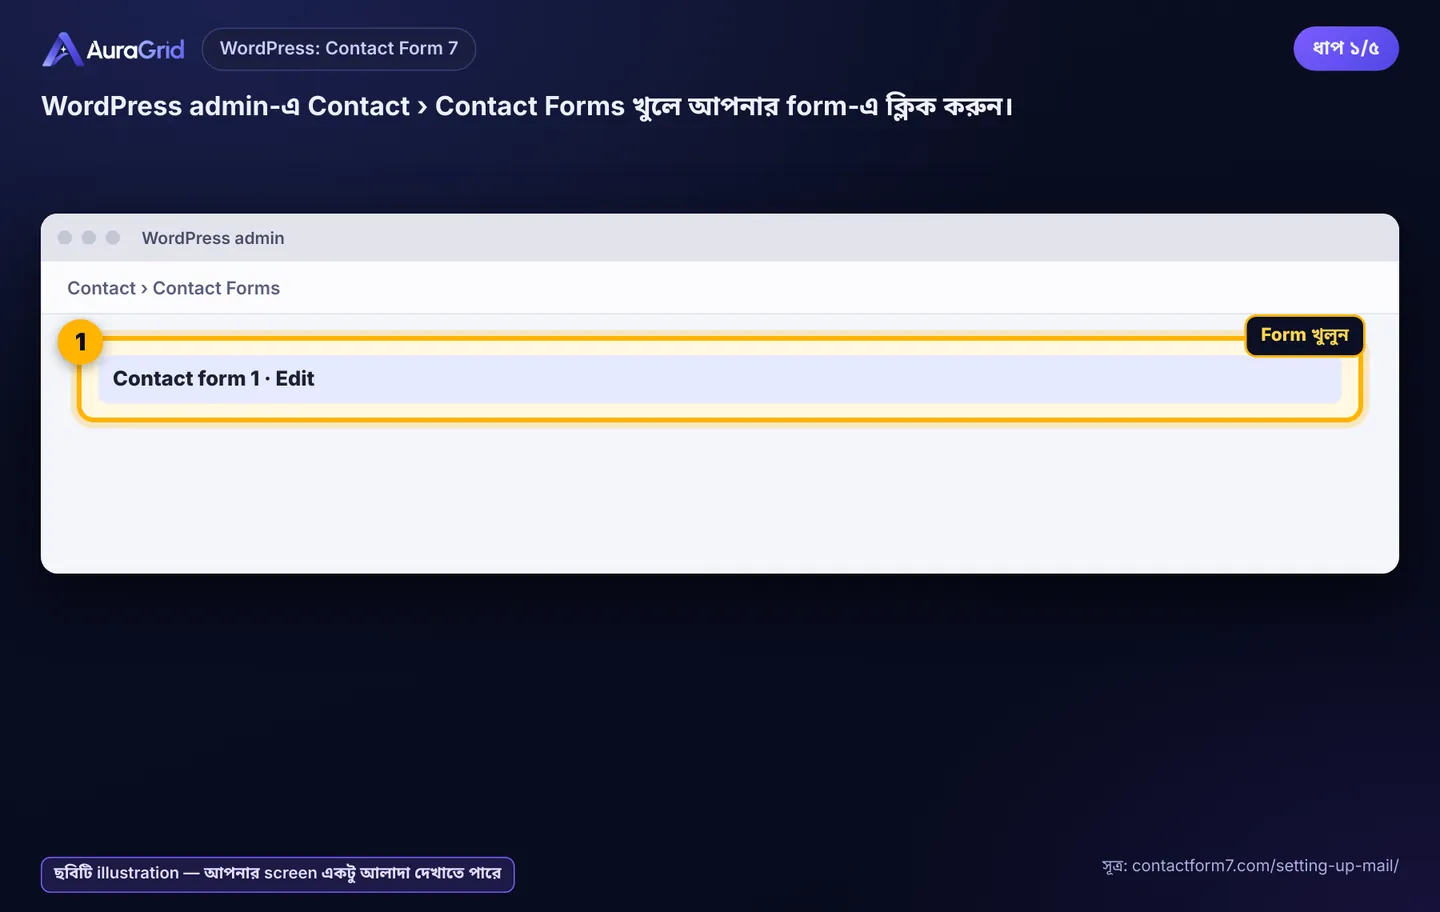
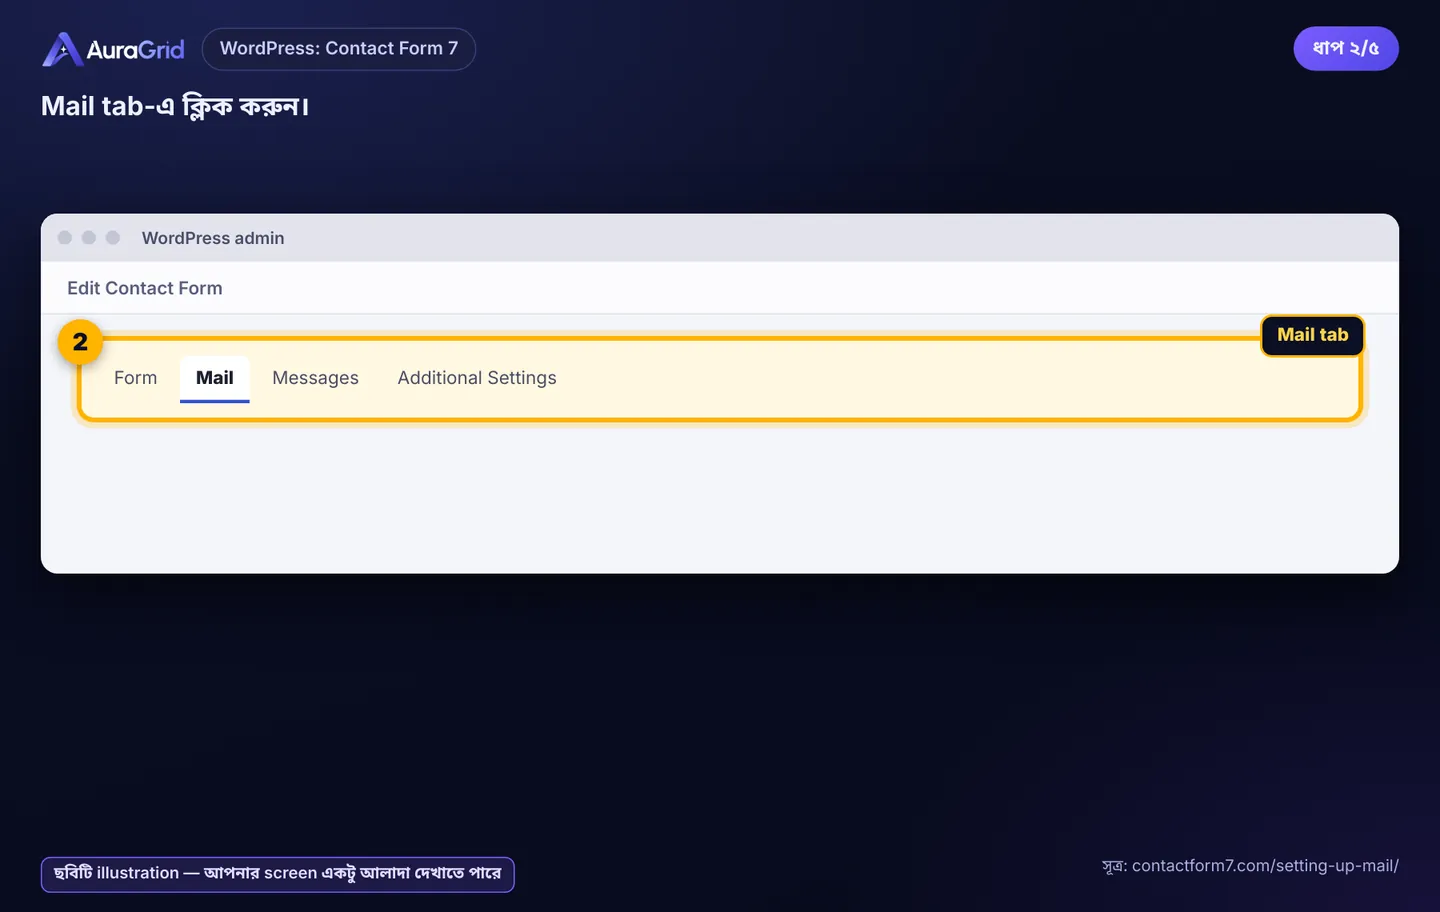
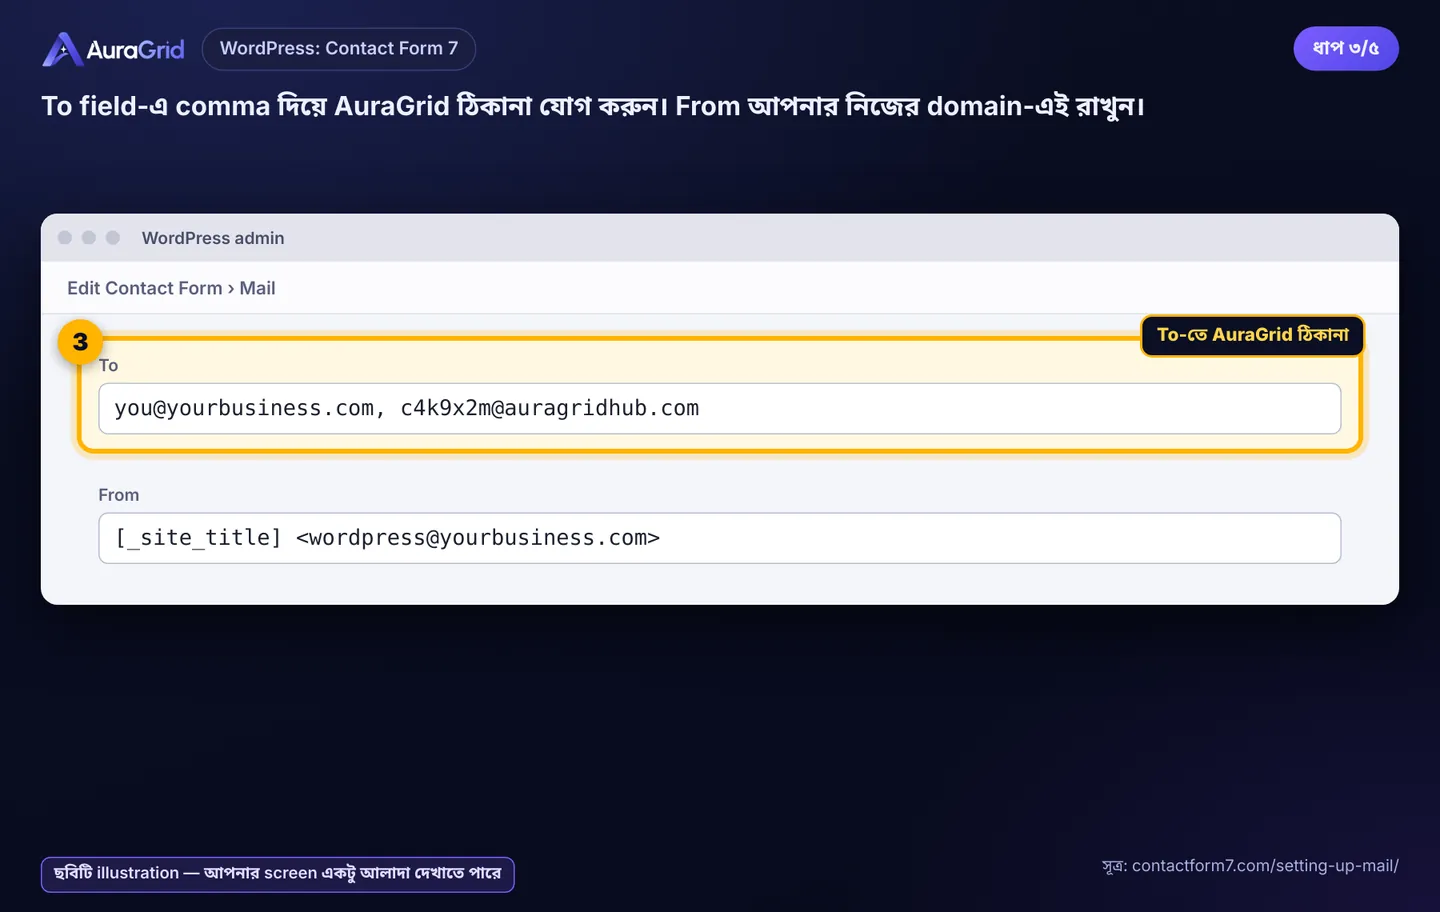
২ঘ. WordPress: Contact Form 7
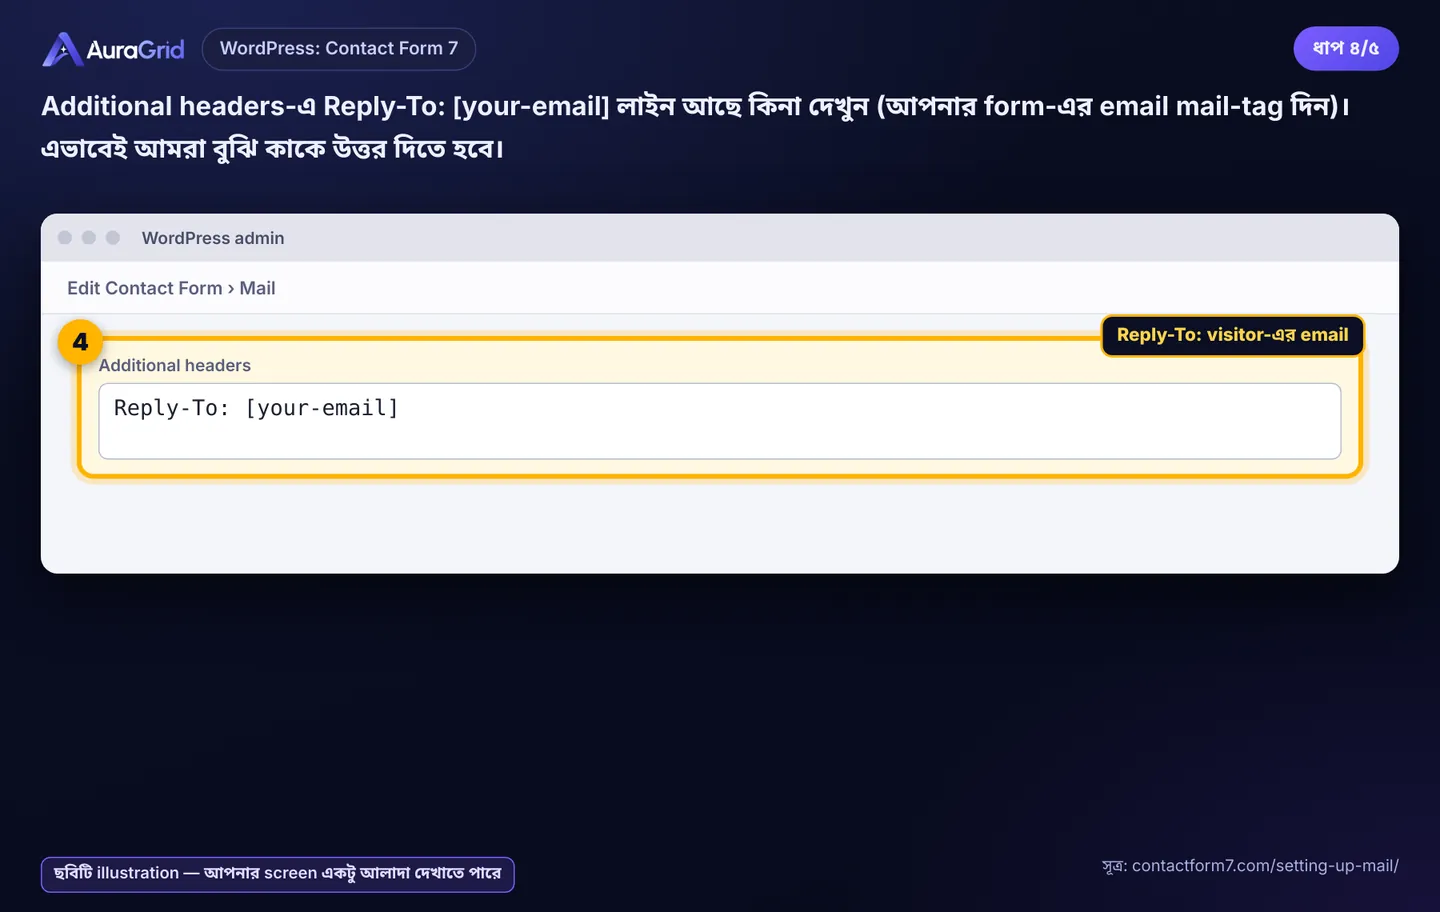
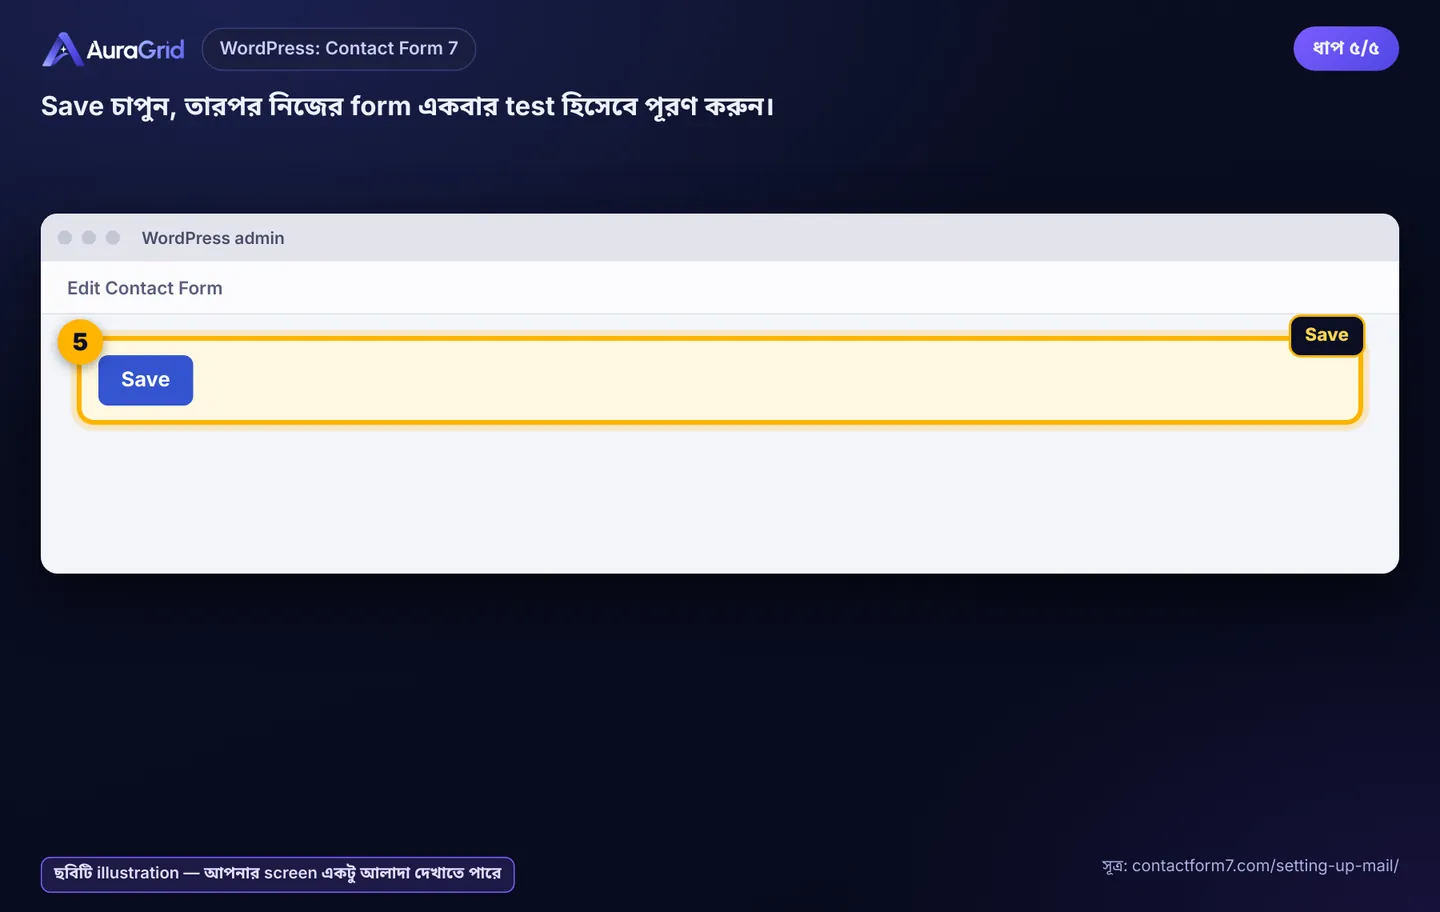
Contact › Contact Forms › form খুলুন। ২. Mail tab। ৩. To-তে comma দিয়ে AuraGrid ঠিকানা; From নিজের domain-এ। ৪. Additional headers-এ । ৫. Save, তারপর একবার test।
Illustration, your screen may look slightly differentIllustration, your screen may look slightly differentIllustration, your screen may look slightly differentIllustration, your screen may look slightly differentIllustration, your screen may look slightly different
২ঙ. WordPress: WPForms
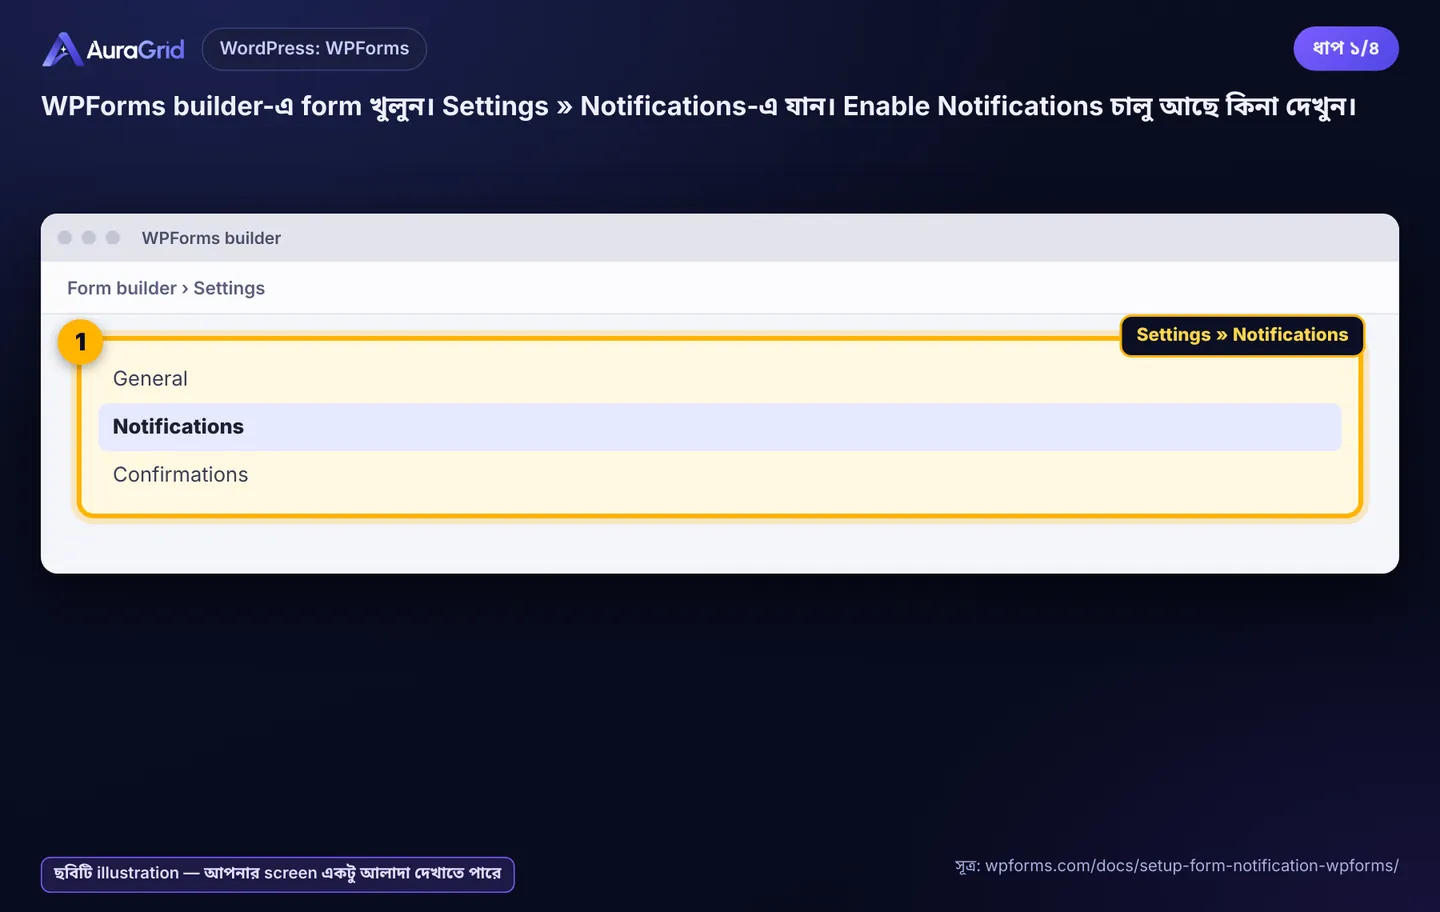
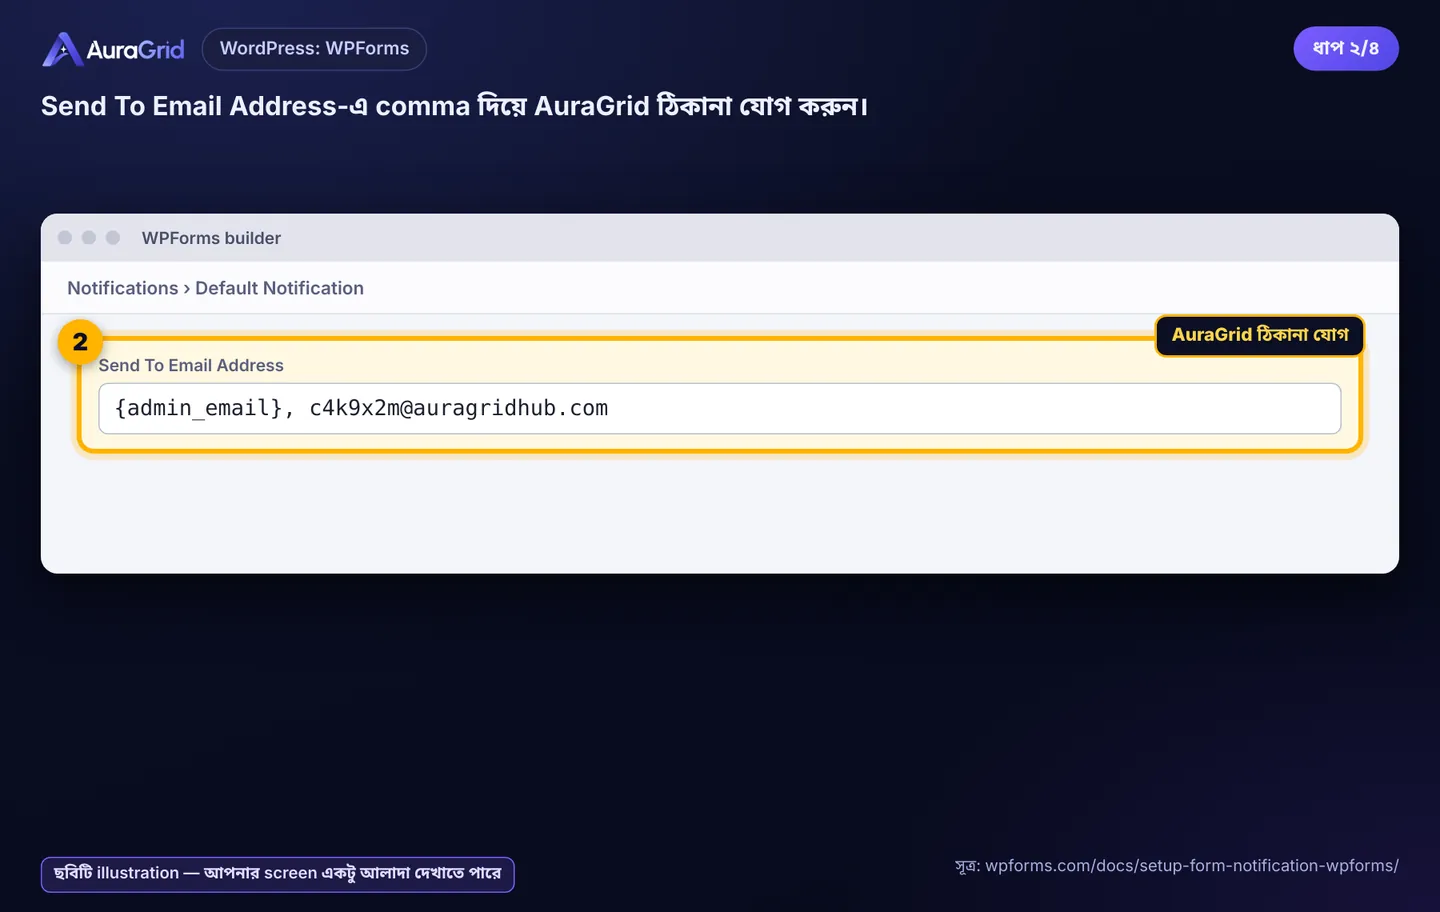
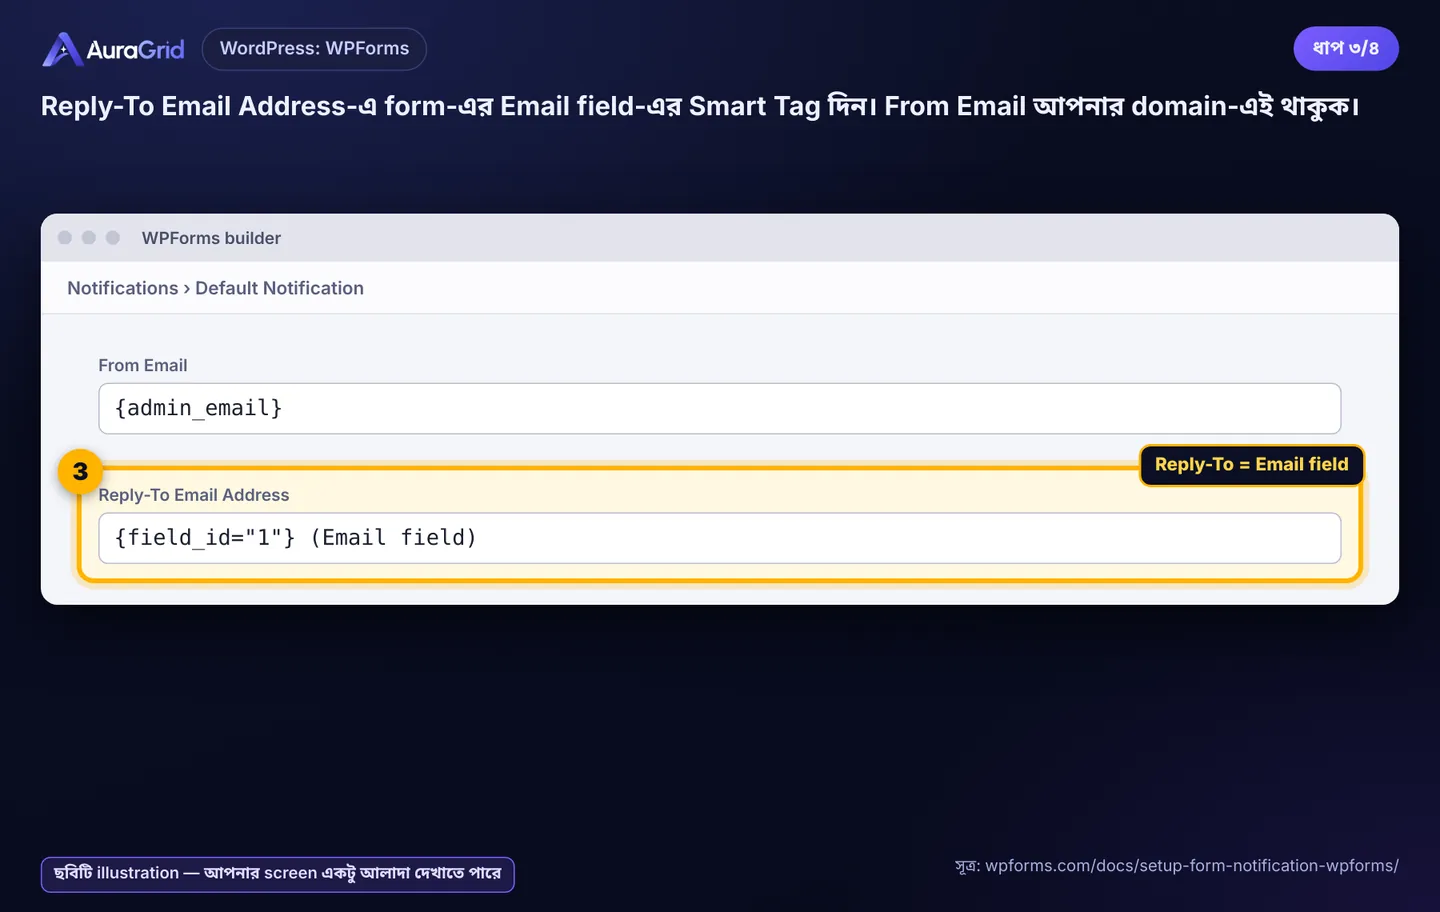
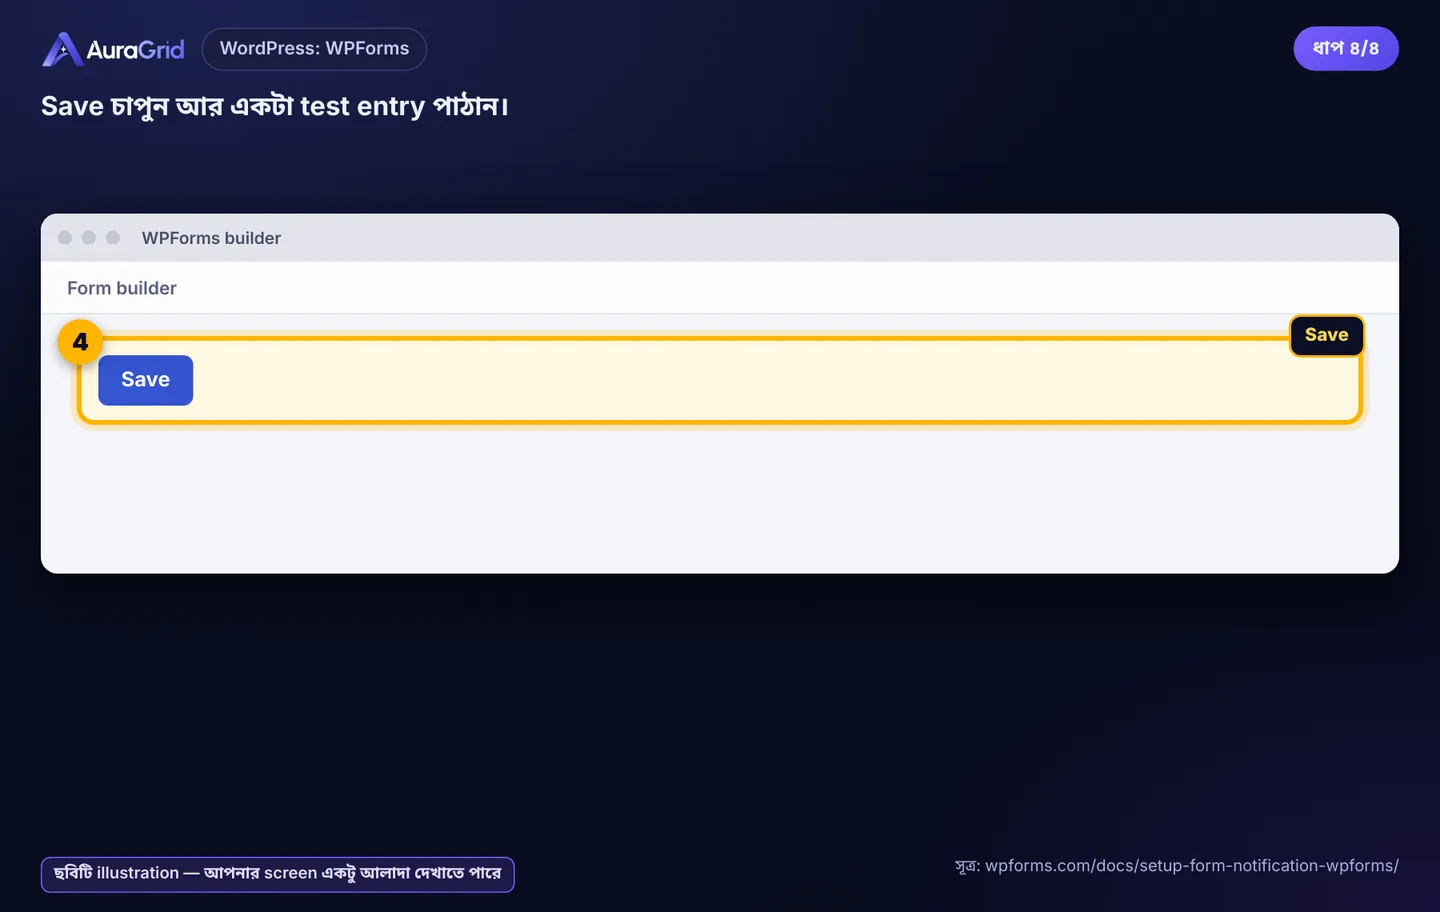
Settings » Notifications, Enable Notifications চালু। ২. Send To Email Address-এ comma দিয়ে AuraGrid ঠিকানা। ৩. Reply-To Email Address-এ Email field-এর Smart Tag। ৪. Save, test entry।
Illustration, your screen may look slightly differentIllustration, your screen may look slightly differentIllustration, your screen may look slightly differentIllustration, your screen may look slightly different
২চ. Wix Forms
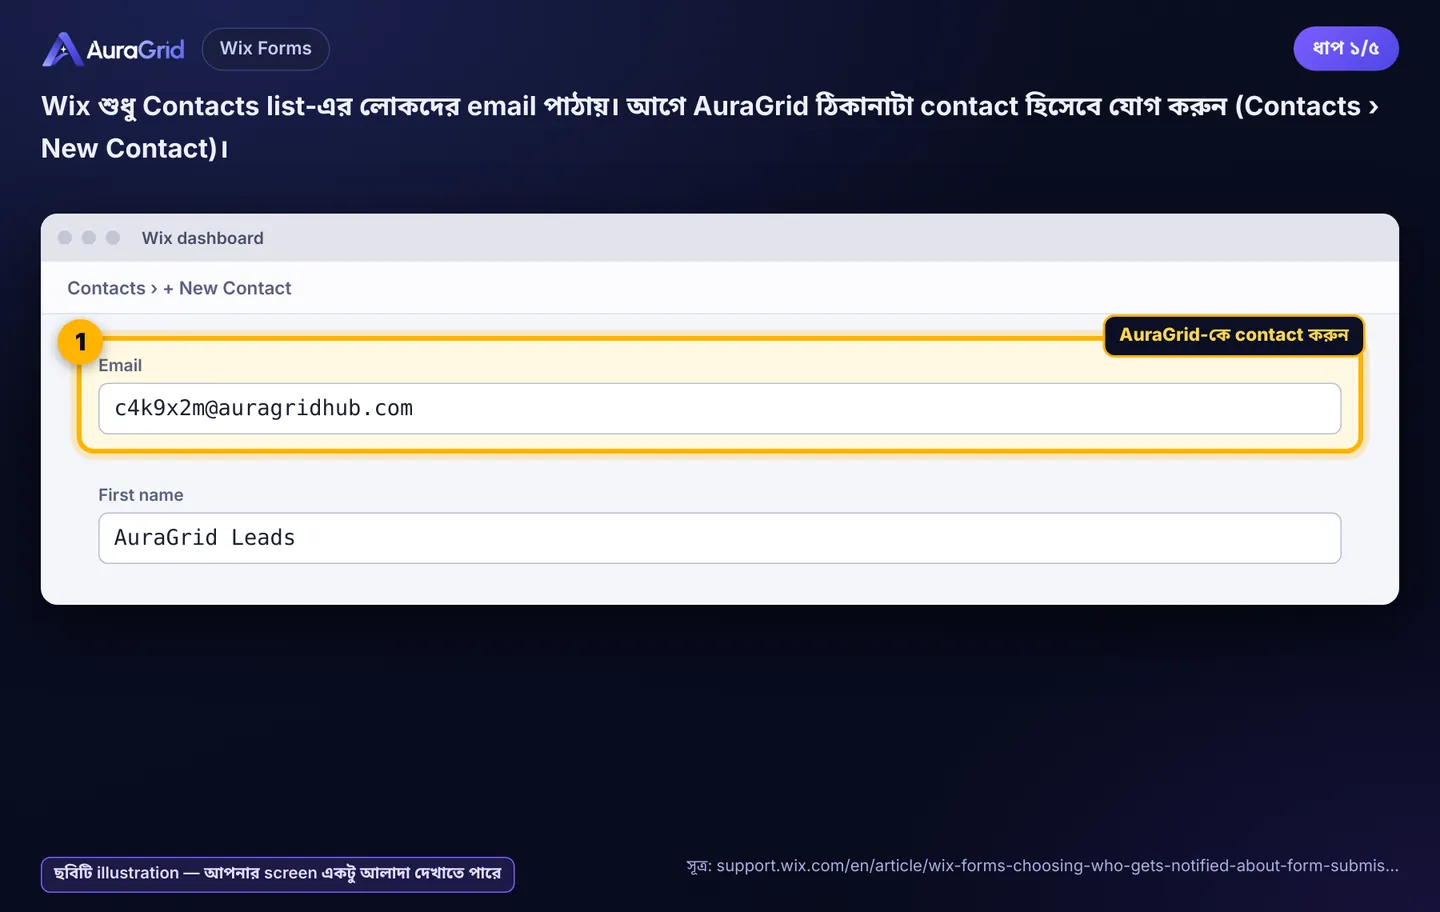
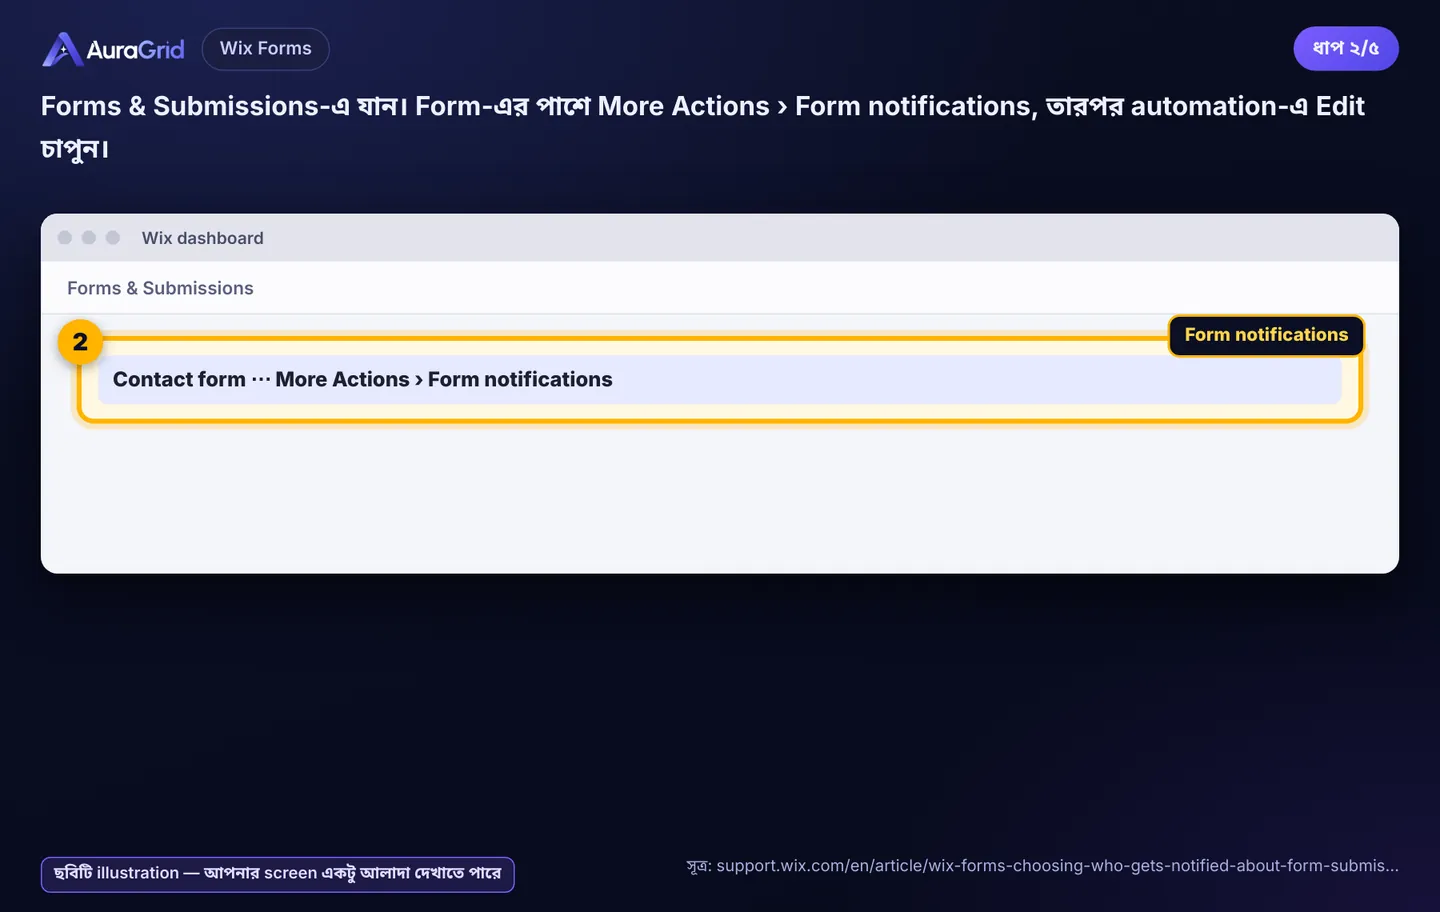
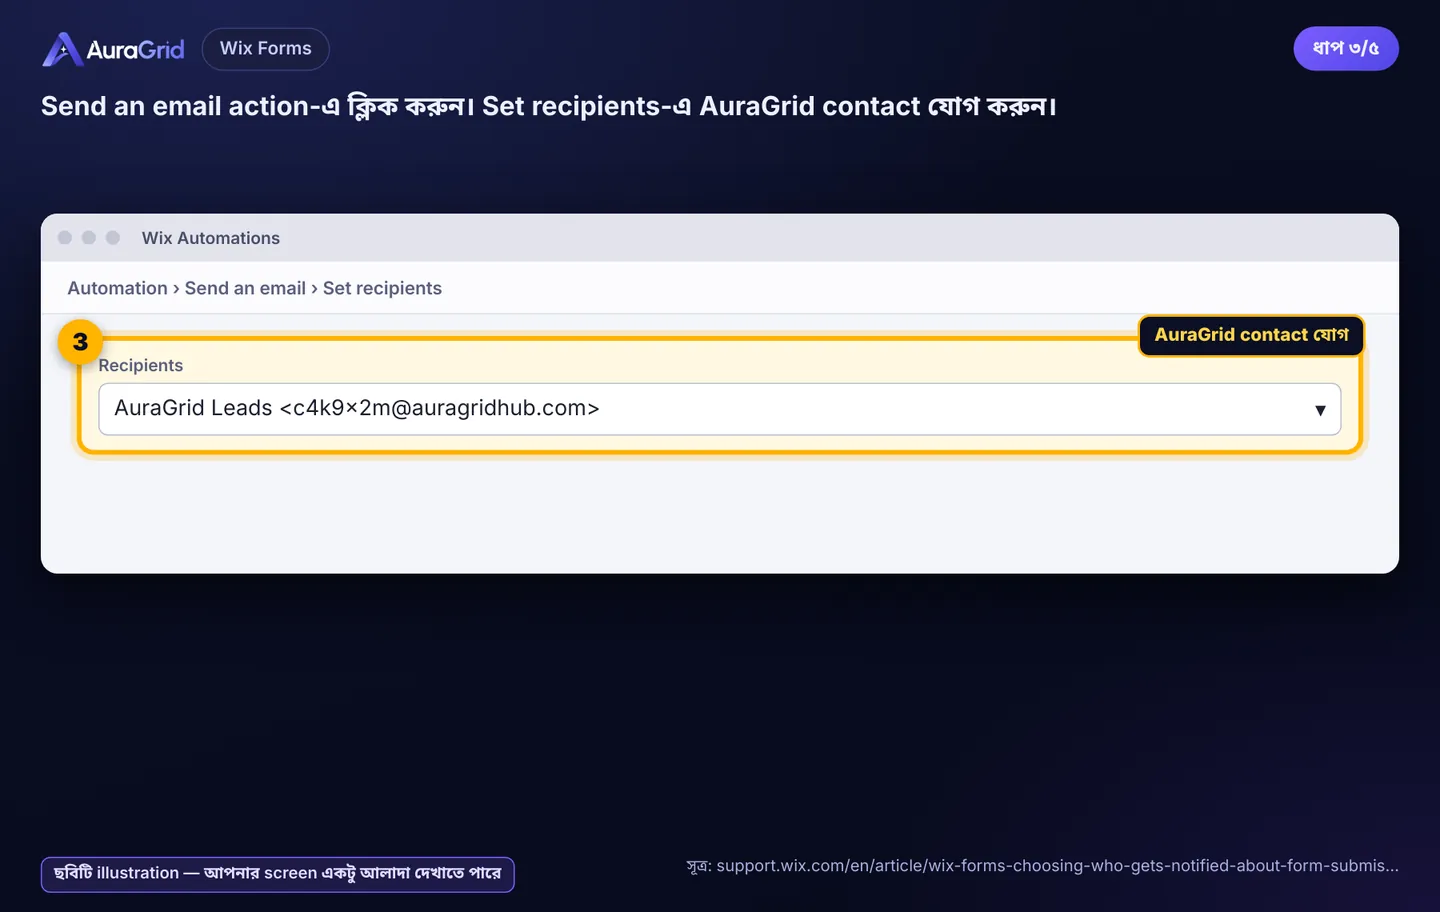
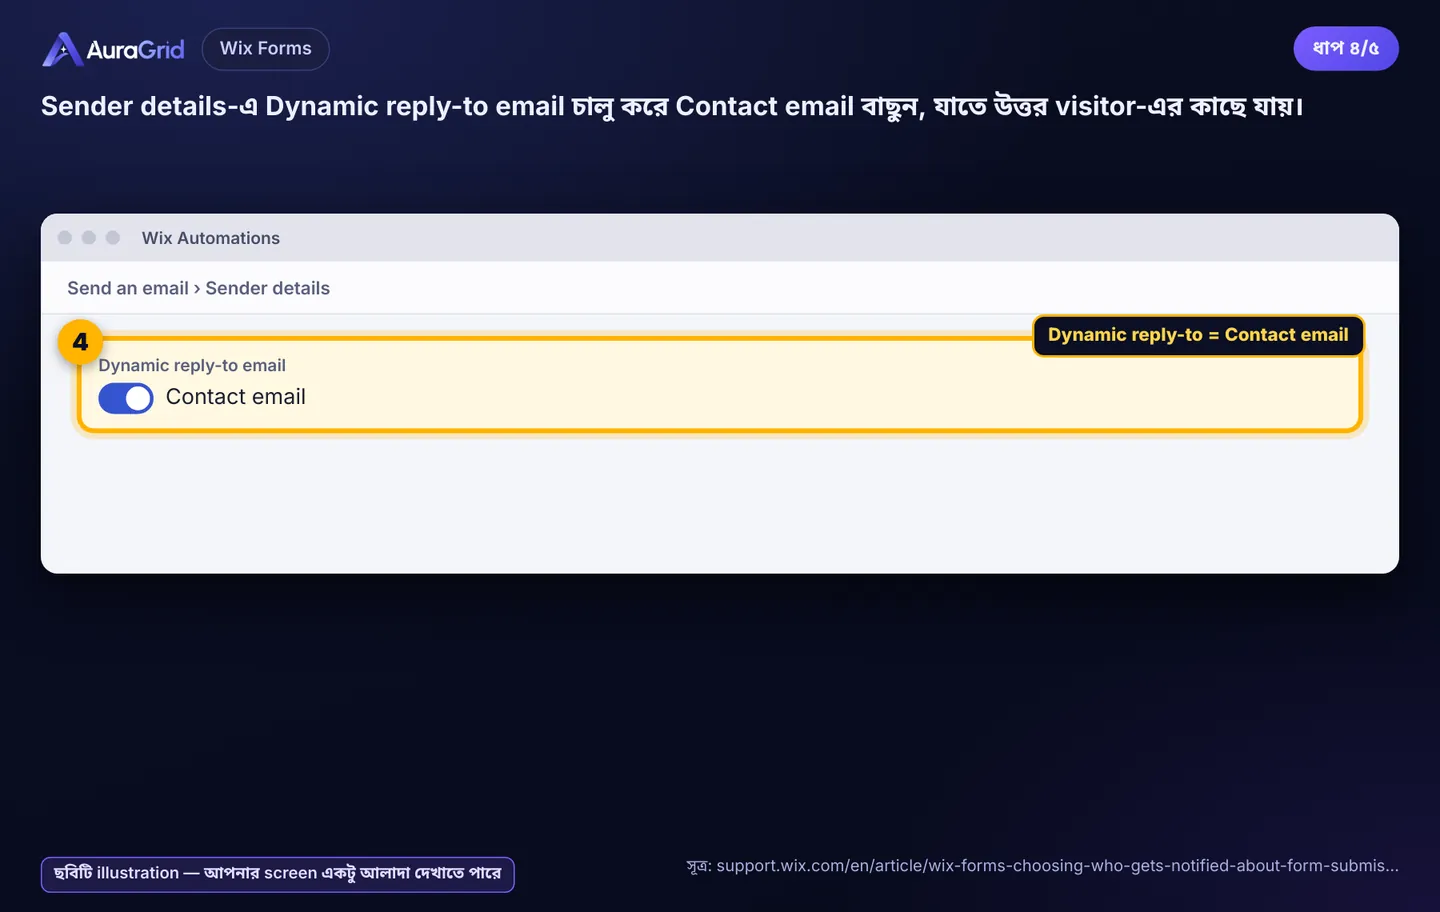
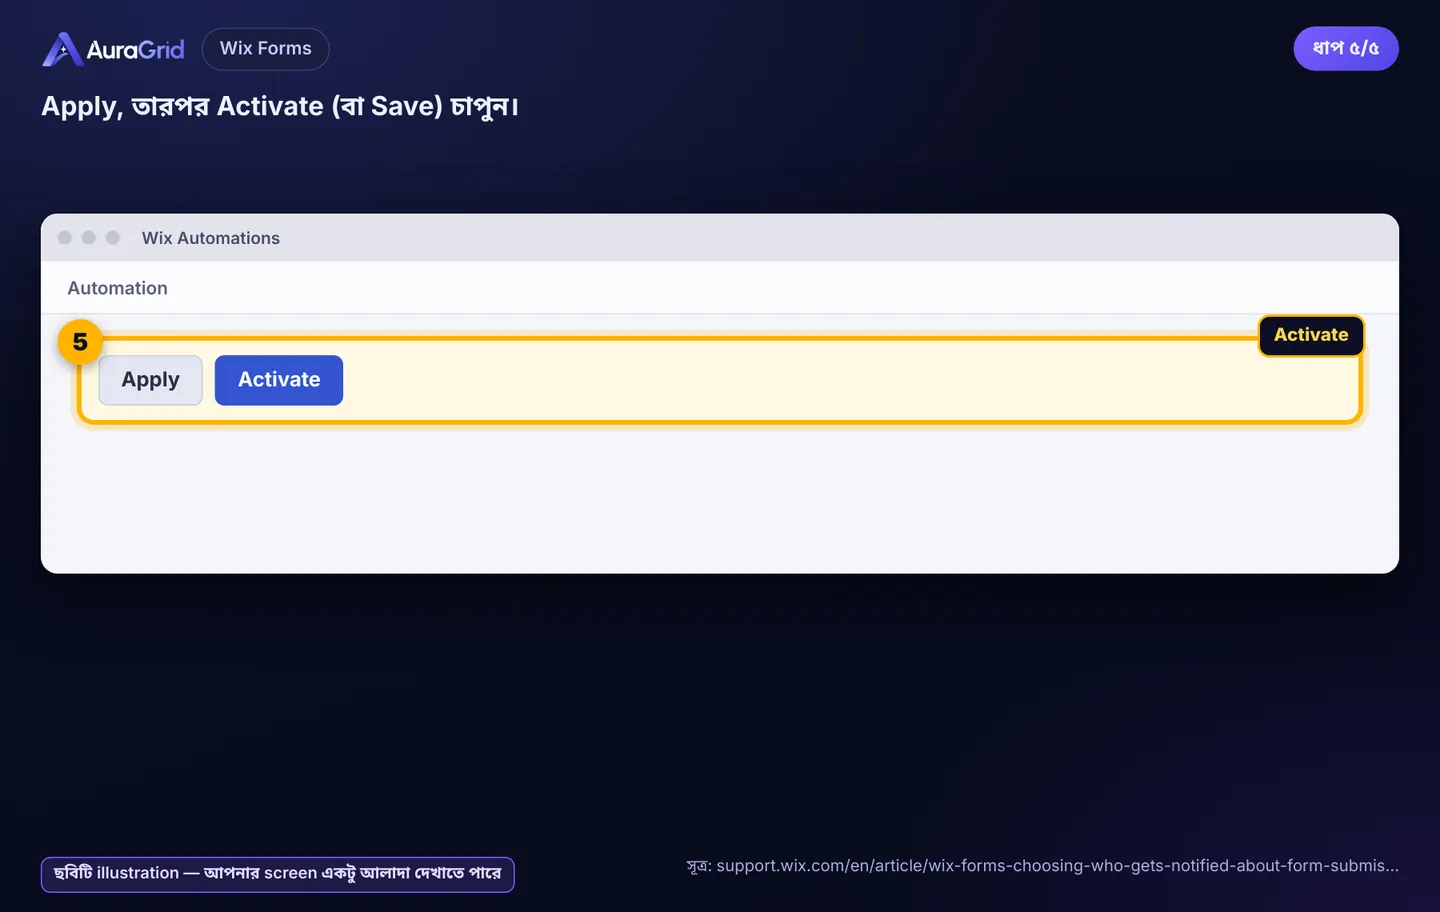
Contacts › New Contact-এ AuraGrid ঠিকানা যোগ করুন। ২. Forms & Submissions › More Actions › Form notifications › Edit। ৩. Send an email › Recipients-এ AuraGrid contact। ৪. Sender details › Dynamic reply-to email › Contact email। ৫. Apply, তারপর activate/save।
Illustration, your screen may look slightly differentIllustration, your screen may look slightly differentIllustration, your screen may look slightly differentIllustration, your screen may look slightly differentIllustration, your screen may look slightly different
২ছ. Squarespace
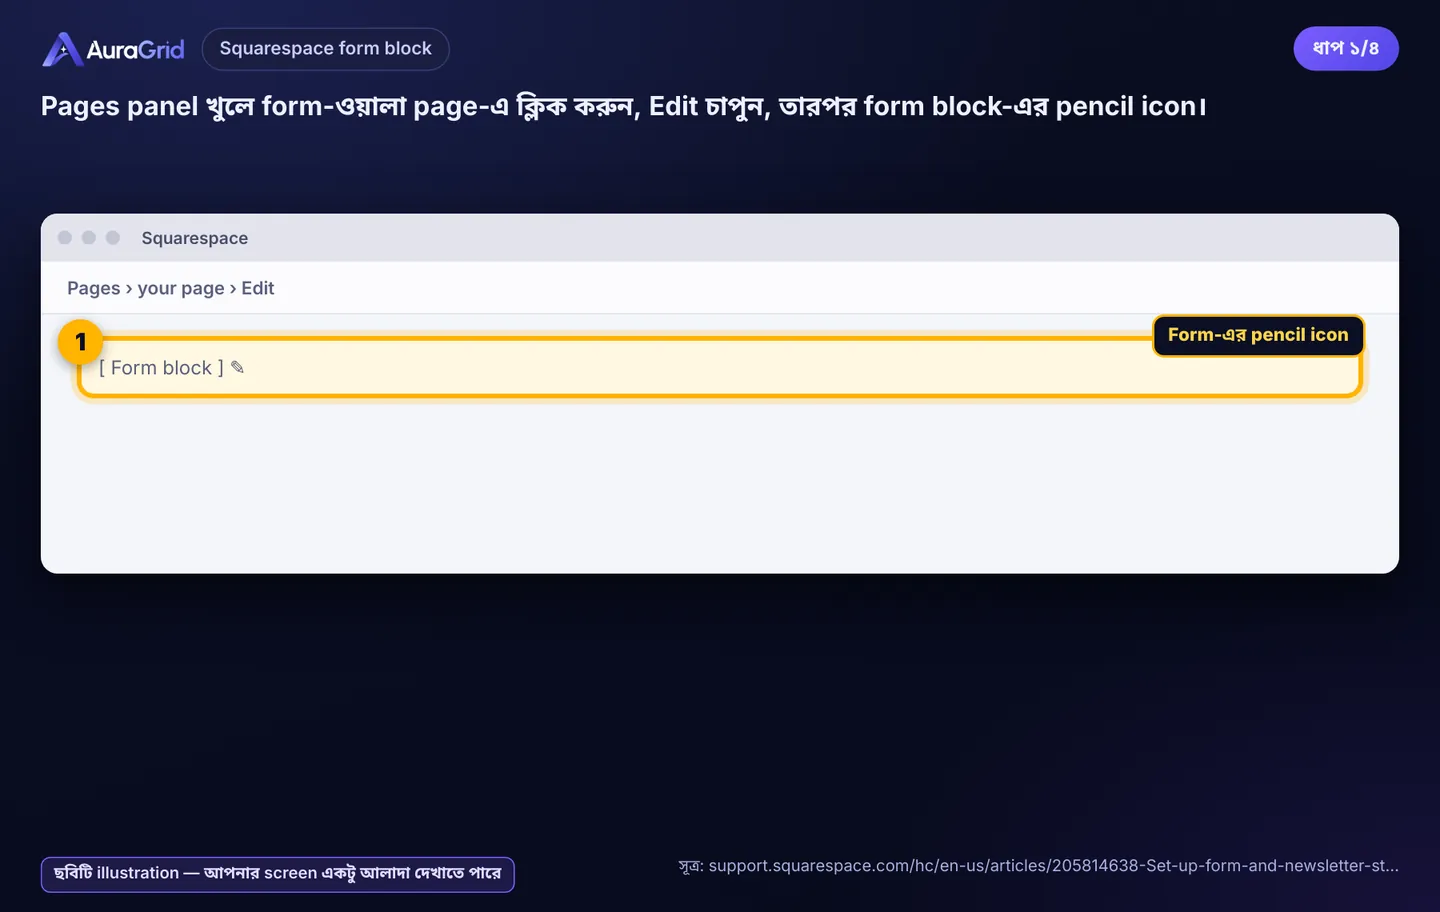
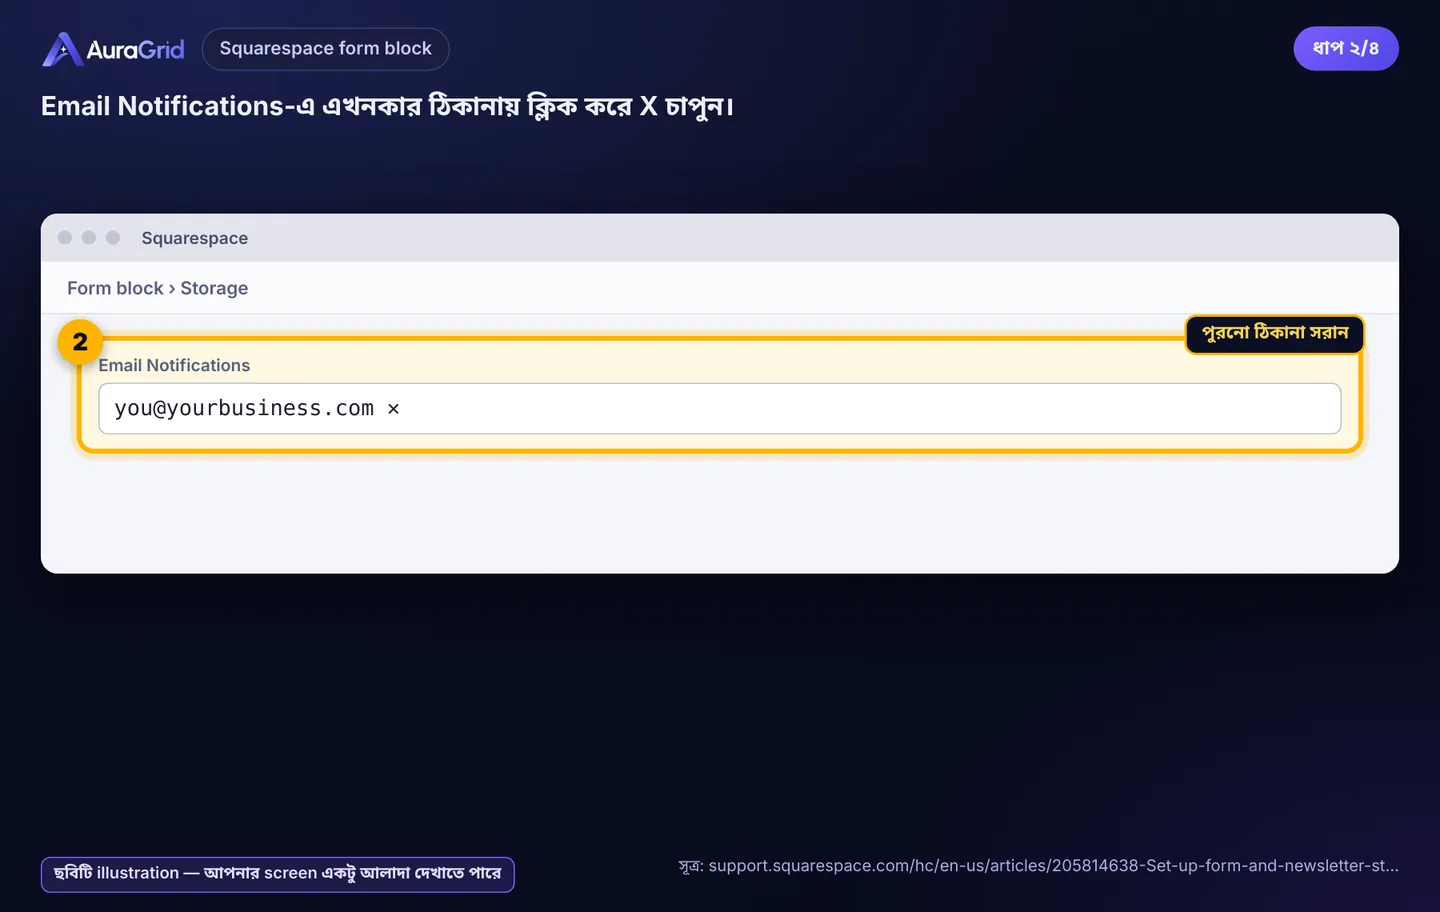
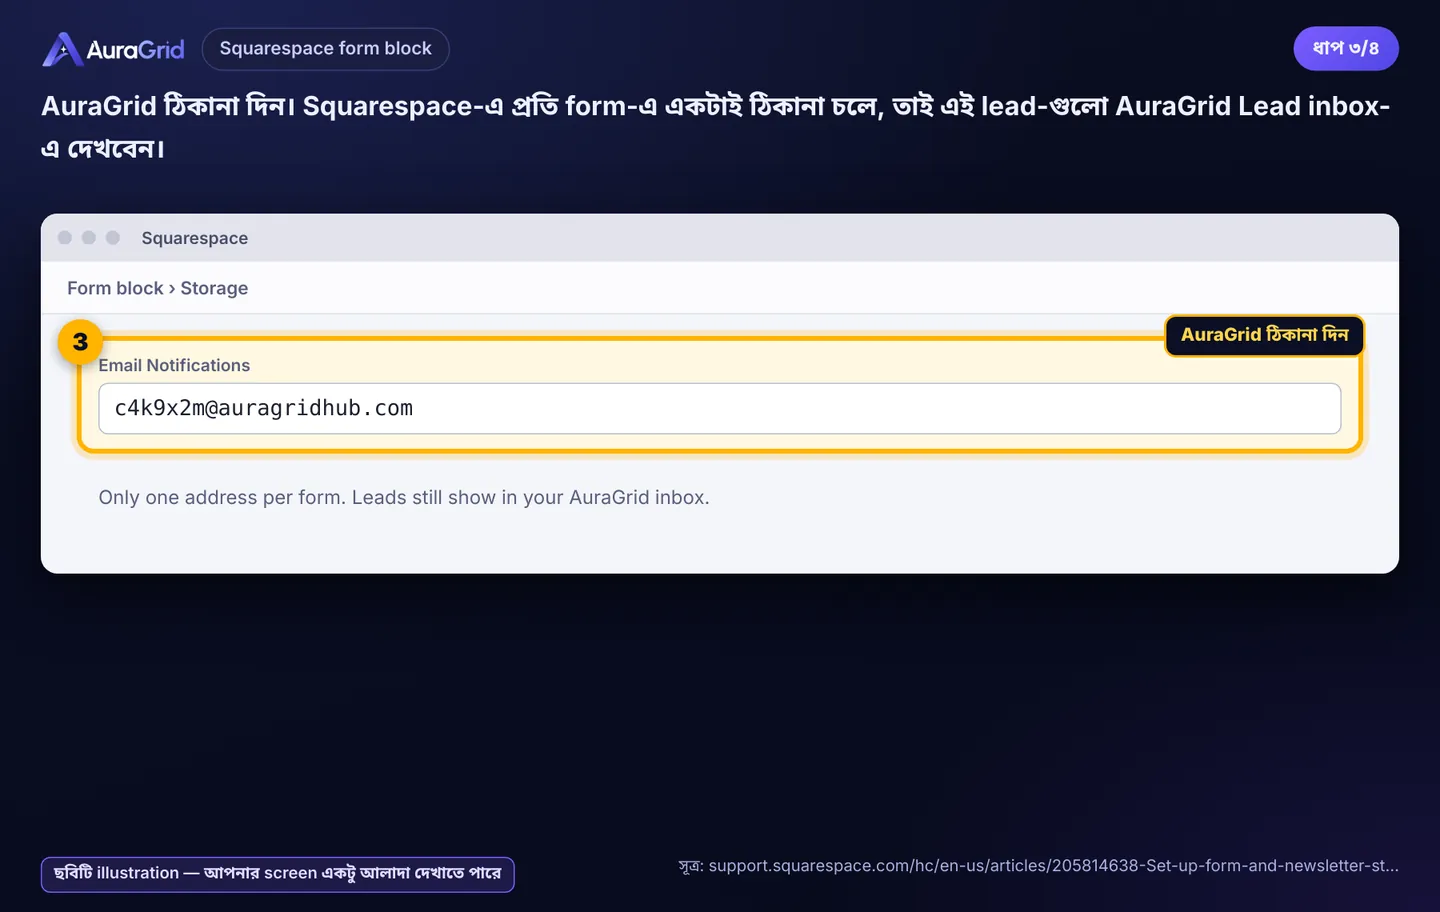
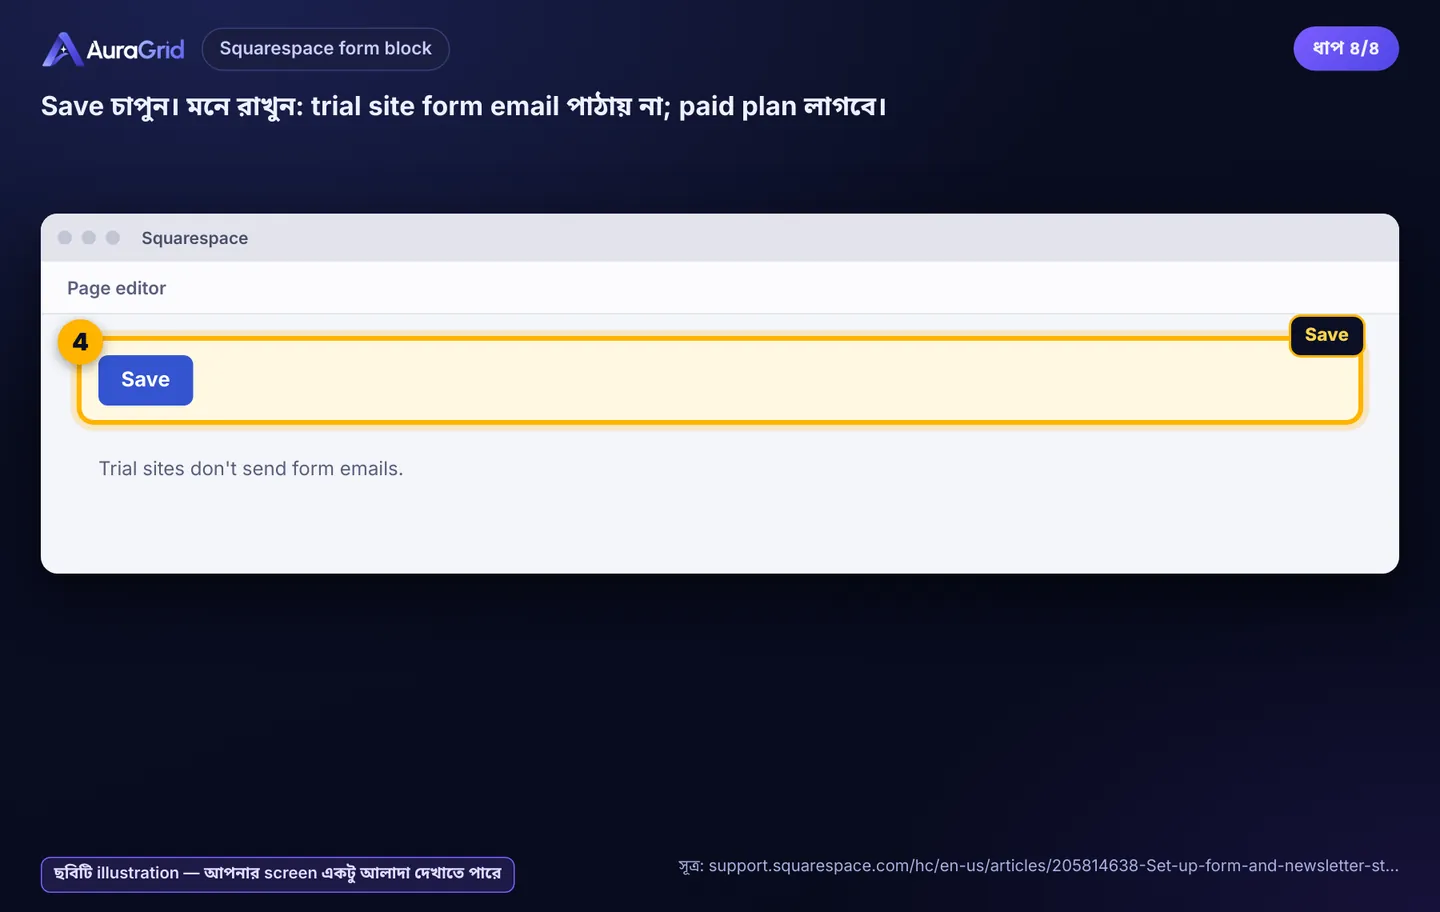
Pages › page › Edit › form block-এর pencil। ২. Email Notifications-এ পুরনো ঠিকানা › X। ৩. AuraGrid ঠিকানা দিন (প্রতি form-এ একটাই ঠিকানা; lead দেখবেন Lead inbox-এ)। ৪. Save। Trial site form email পাঠায় না।
Illustration, your screen may look slightly differentIllustration, your screen may look slightly differentIllustration, your screen may look slightly differentIllustration, your screen may look slightly different
২জ. Webflow
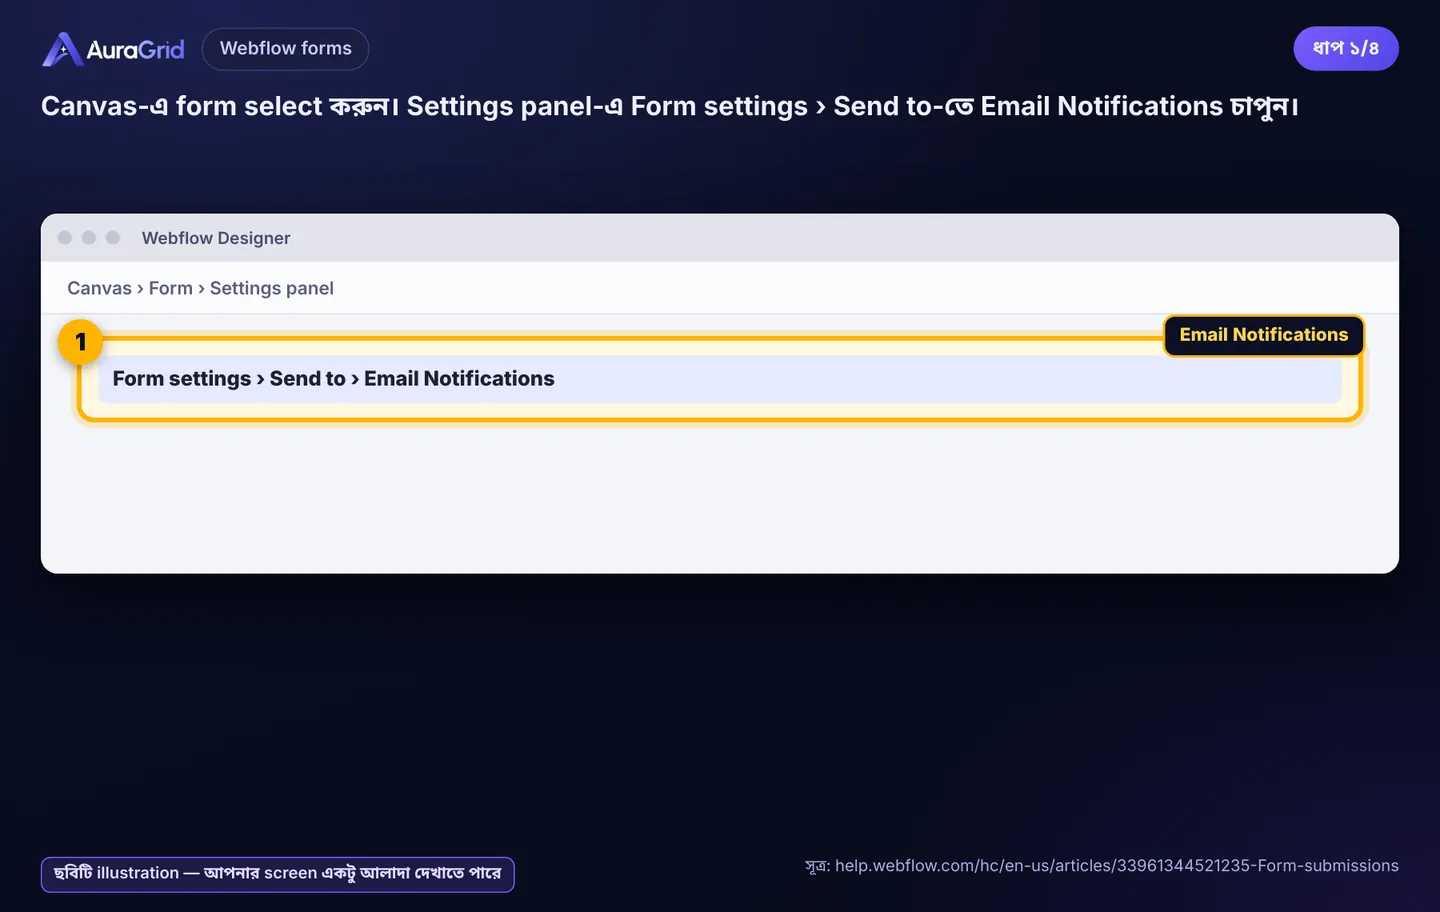
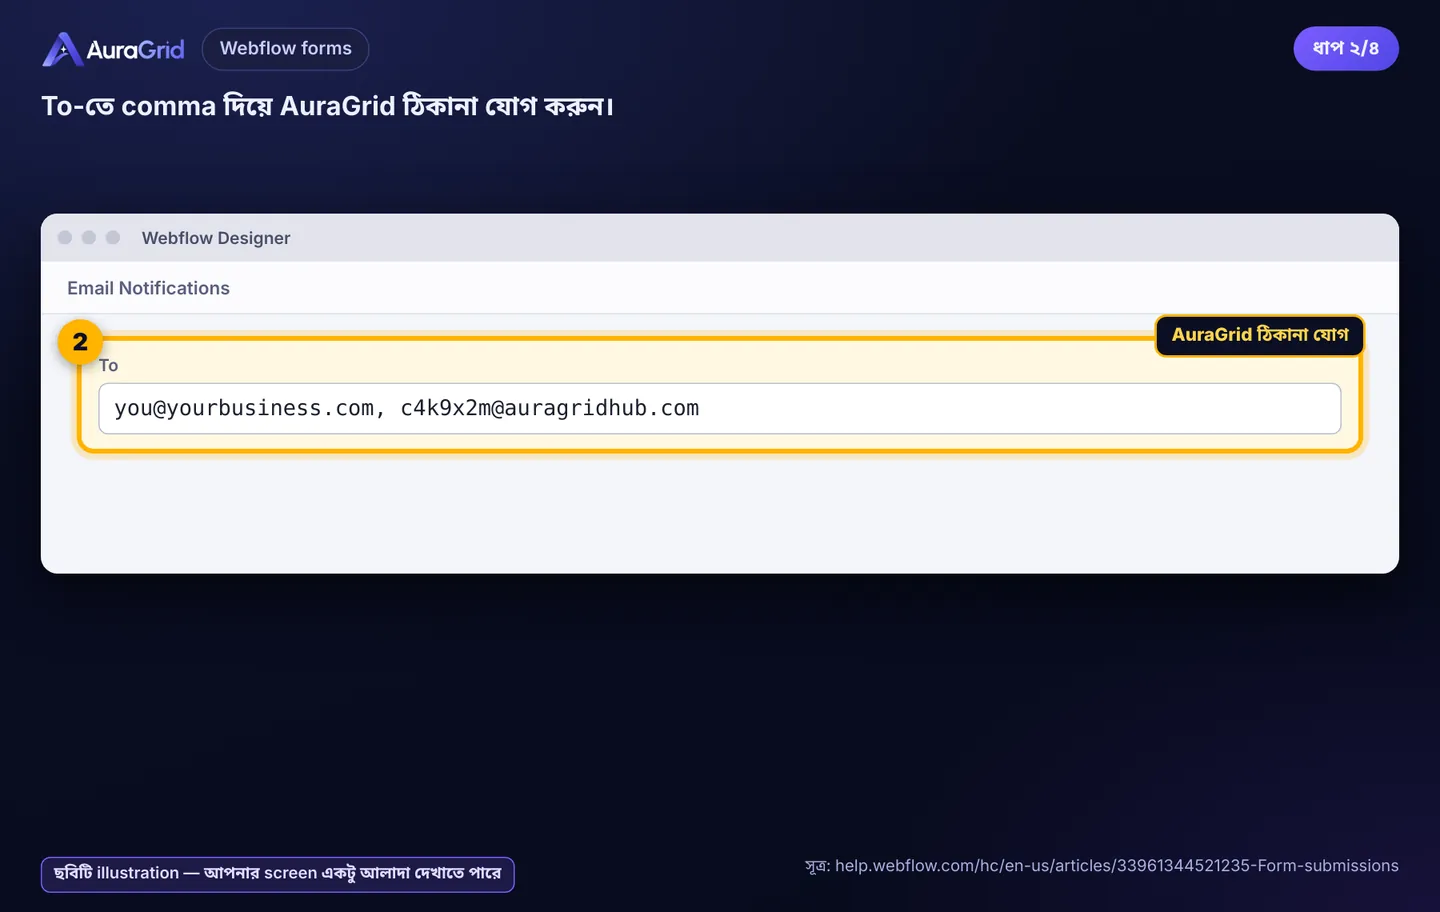
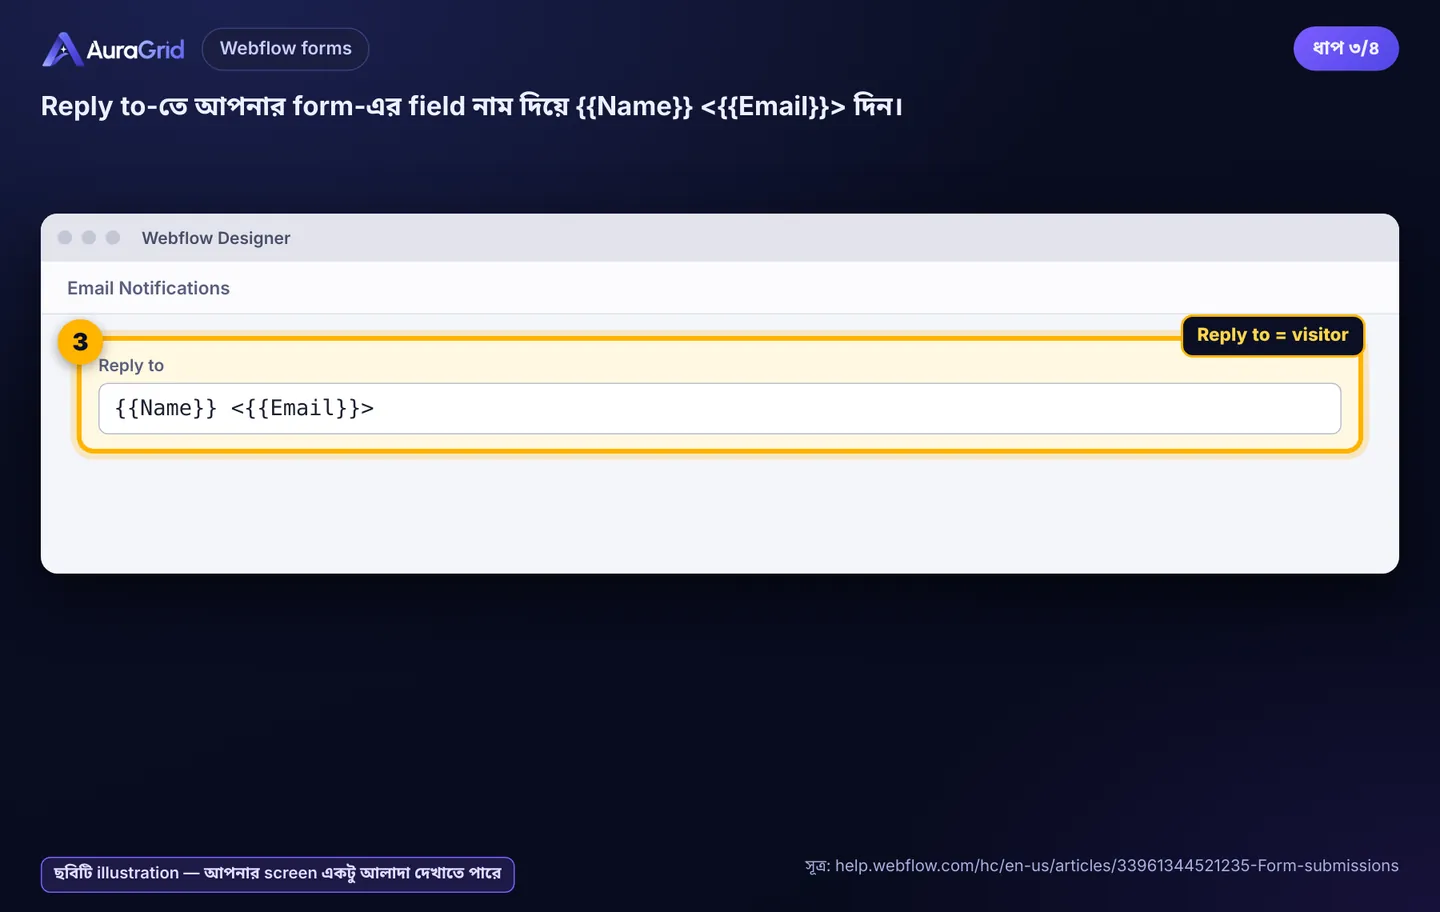
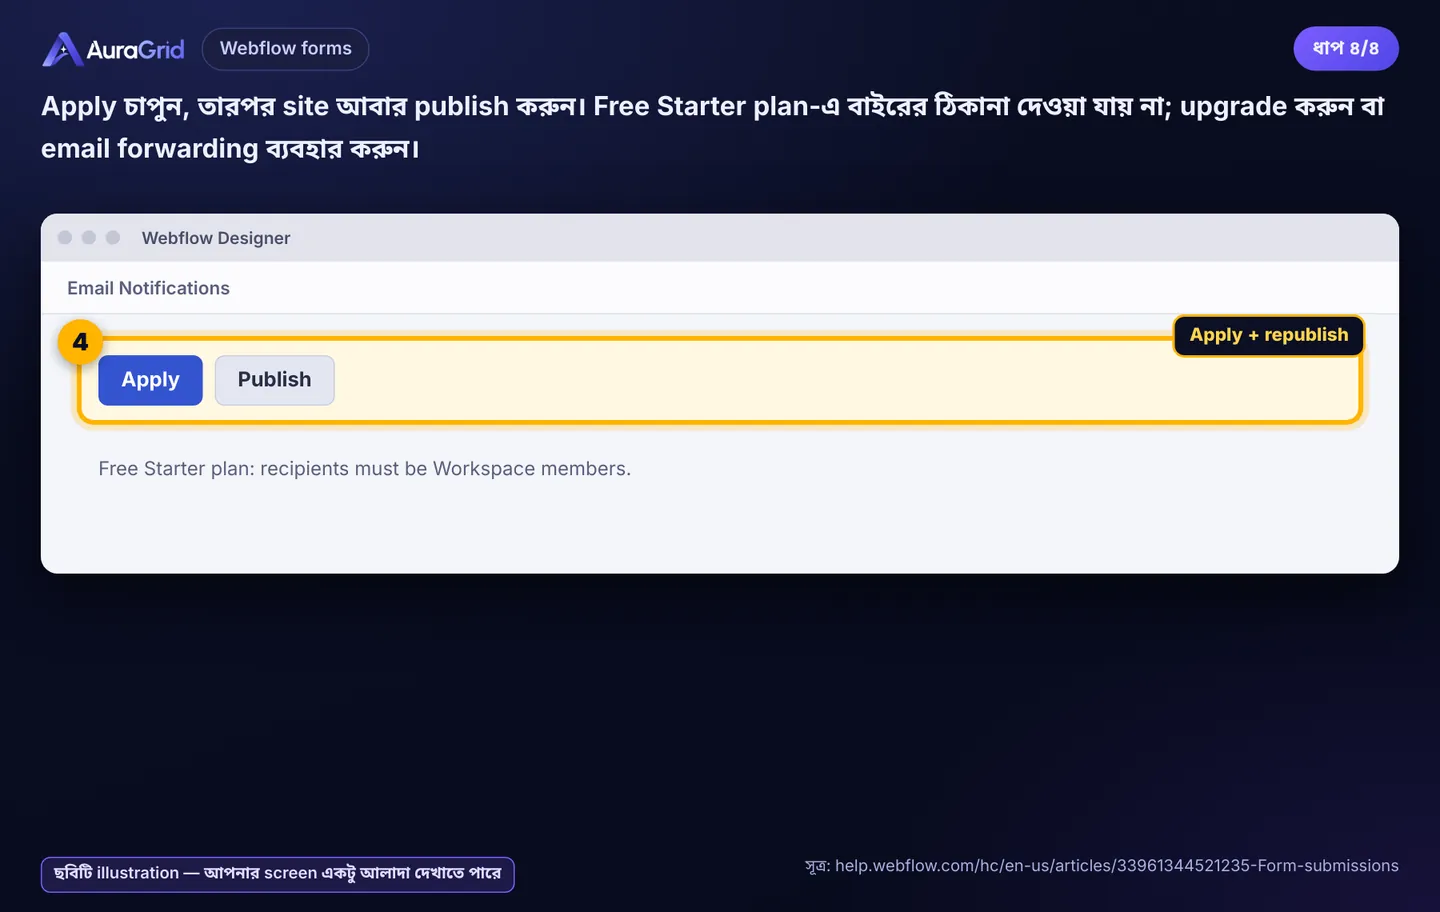
Form › Settings › Form settings › Send to › Email Notifications। ২. To-তে comma দিয়ে AuraGrid ঠিকানা। ৩. Reply to: । ৪. Apply, আবার publish। Free Starter plan-এ শুধু Workspace member পায়।
Illustration, your screen may look slightly differentIllustration, your screen may look slightly differentIllustration, your screen may look slightly differentIllustration, your screen may look slightly different
২ঝ. অন্য যেকোনো form tool
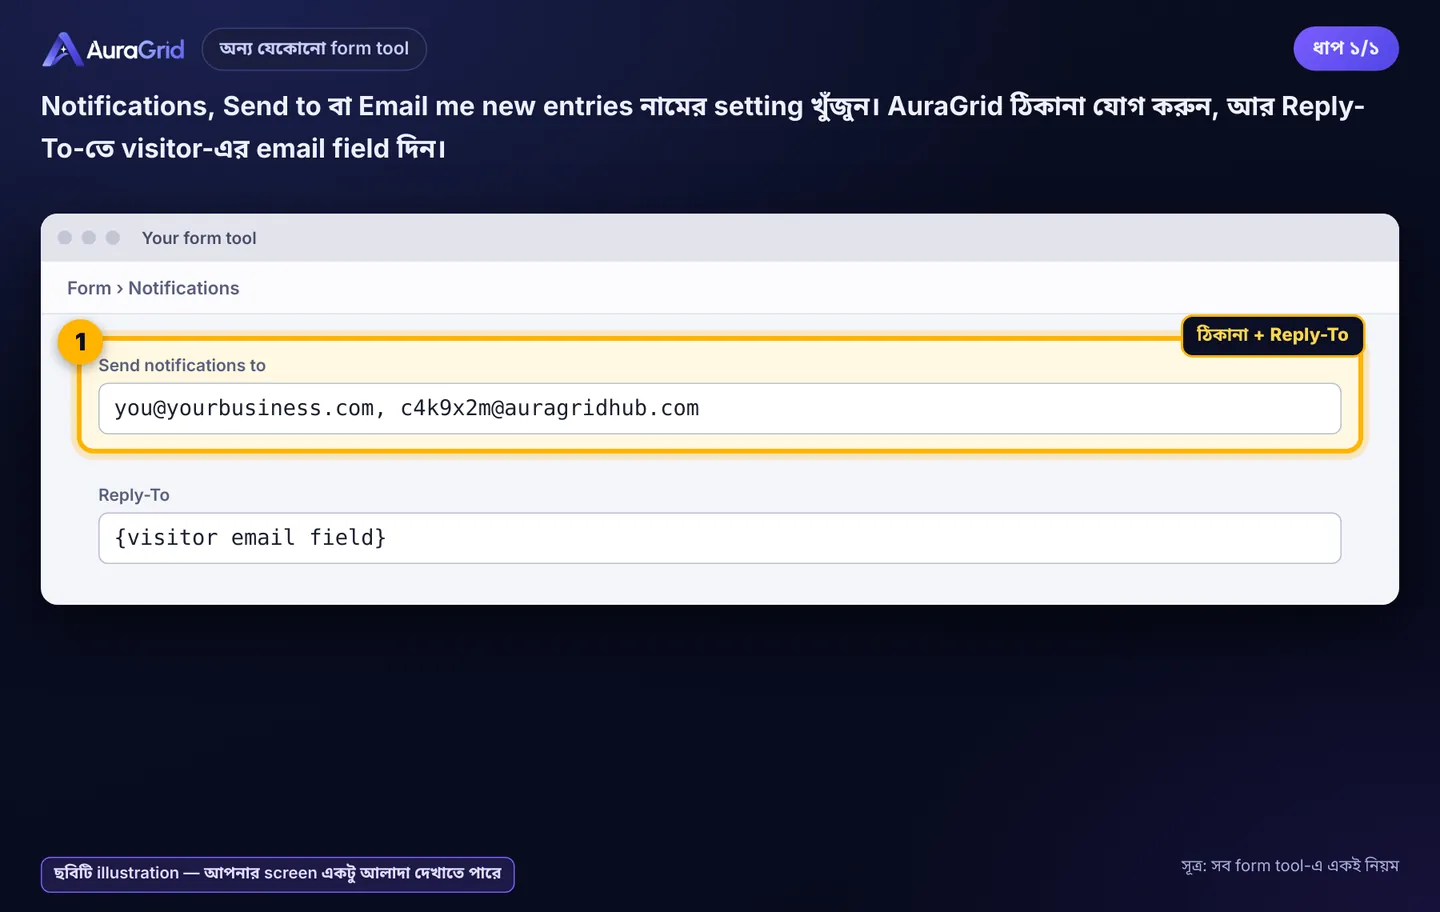
Notifications / Send to setting-এ AuraGrid ঠিকানা দিন, আর Reply-To-তে visitor-এর email field।
Illustration, your screen may look slightly different
২ঞ. শীঘ্রই আসছে
Website chat widget; Google Business Profile (Google chat বন্ধ করেছে, call আপনার ফোনেই আসে); Yelp, Thumbtack, Angi (এদের email platform থেকে আসে, তাই আপাতত platform-এর ভেতরেই উত্তর দিন); Facebook Page, Lead Ads, Instagram; WhatsApp, SMS। চালু হলে email-এ জানাব।
সমস্যা হলে
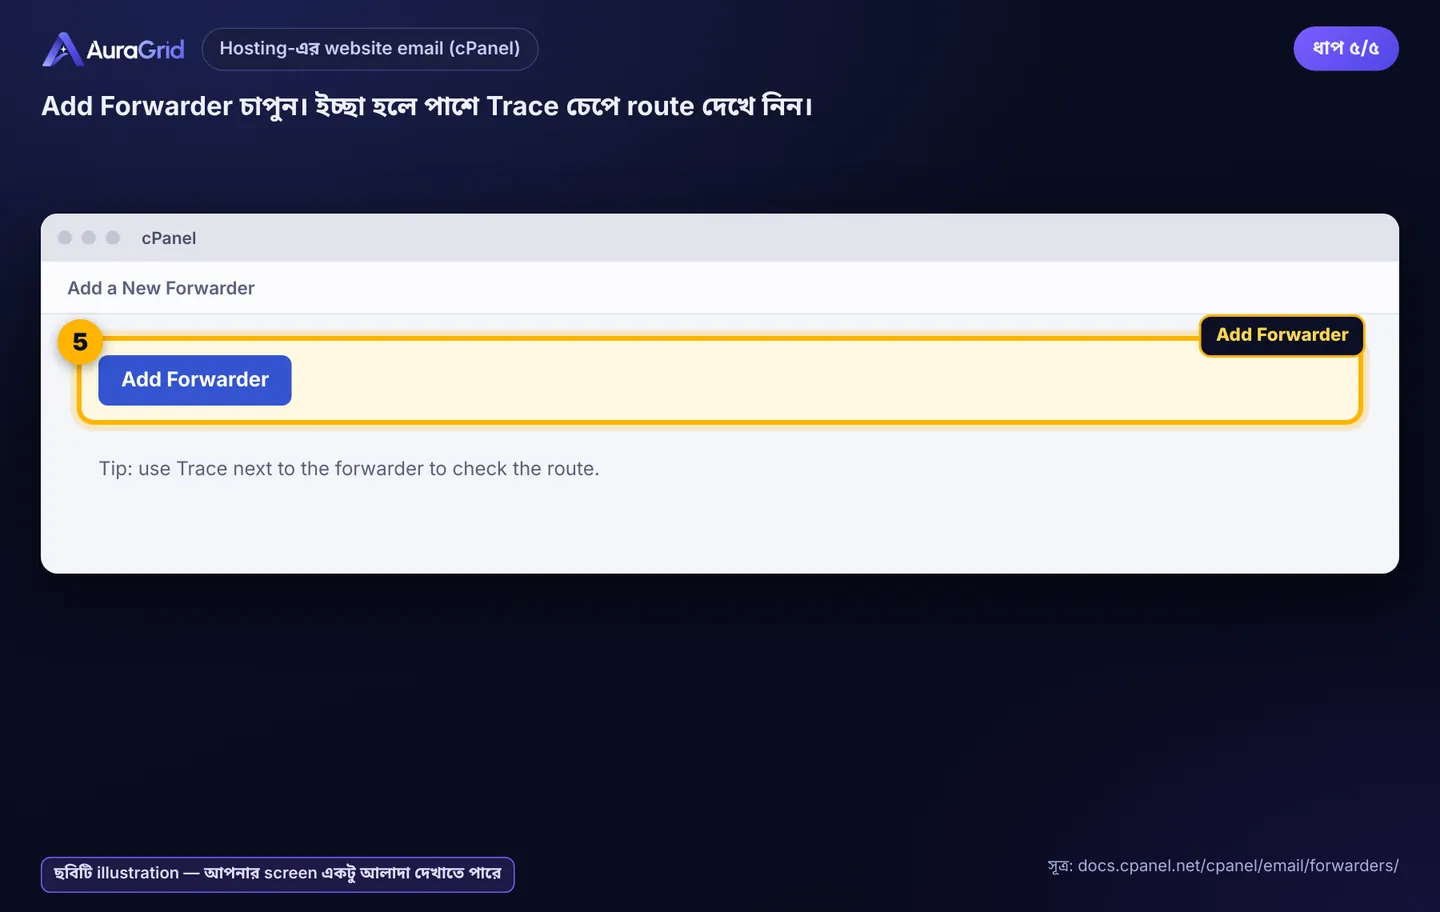
Forward করা email আসছে না: ঠিকানায় space নেই তো? Gmail-এ "Forward a copy…" বেছে Save করেছেন? Outlook-এ rule চালু আর Redirect to বাছাই করা? cPanel-এ Trace চালান। Microsoft 365-এ 5.7.520 মানে admin বাইরে forwarding বন্ধ রেখেছেন।
Gmail verification: link যায় AuraGrid ঠিকানায়, আপনার inbox-এ না। Dashboard › Channels-এ দেখুন। পুরনো হয়ে গেলে Gmail-এ ঠিকানা সরিয়ে আবার যোগ করুন।
Spam folder: Form tool অনেক সময় নিজের notification spam-এ ফেলে। Form-এর প্রেরককে safe sender করুন। Customer-কে বলুন আমাদের প্রথম উত্তর spam-এ থাকলে "not spam" করতে।
Test send: "নিজেকে একটা টেস্ট পাঠান" শুধু login email-এ যায়; দুই test-এর মাঝে এক মিনিট অপেক্ষা করুন। Channels-এর "টেস্ট মেসেজ" inbox-এ একটা নমুনা lead বানায়।
উত্তর ভুল মানুষের কাছে গেছে: form-এ Reply-To-তে visitor-এর email দিন (২ঘ–২ঝ)।
এখনো সমস্যা? support@auragridlabs.com-এ লিখুন (১ কর্মদিবসের মধ্যে উত্তর), অথবা Done-for-You Setup (৳১২,২৯৯, ফেরতযোগ্য নয়) নিন, আমরাই যুক্ত করে দেব।